
 deutsch
Your cart
€
Checkout
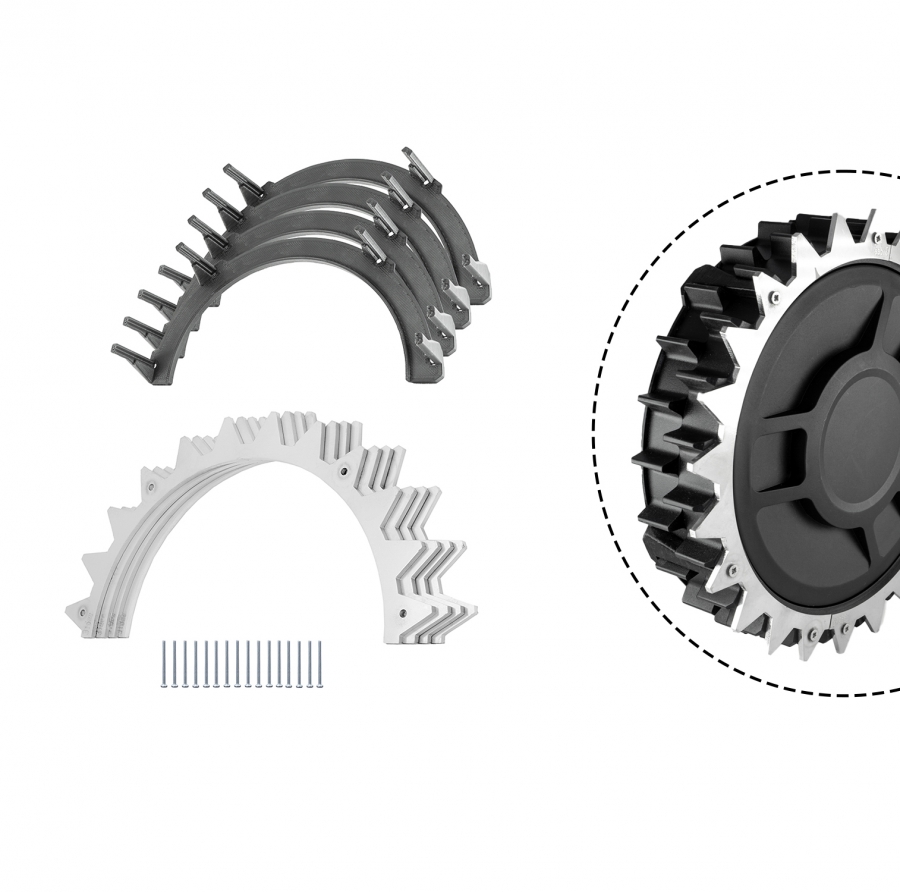
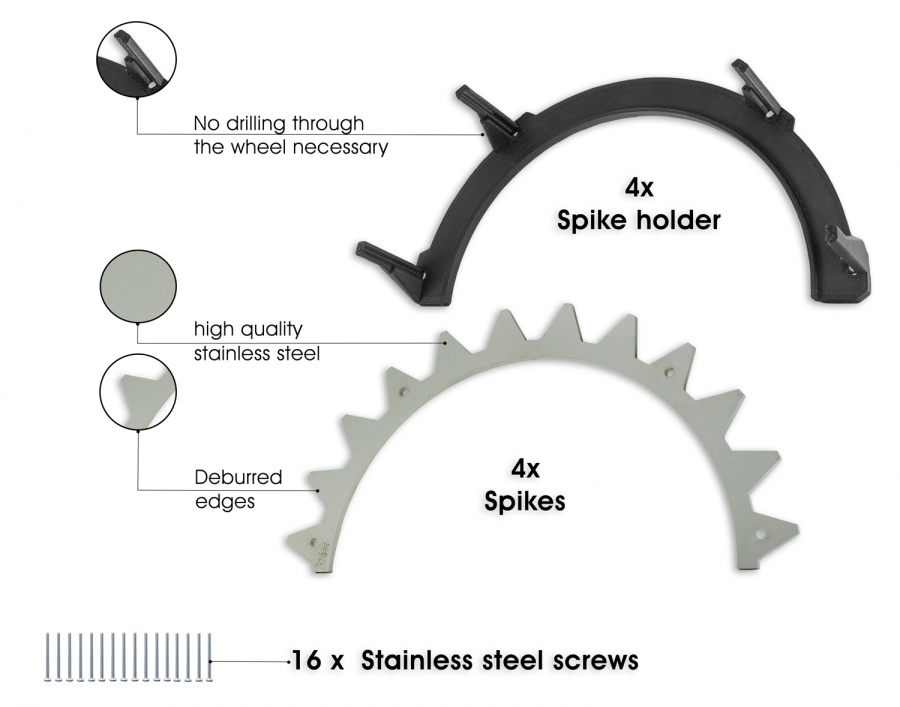
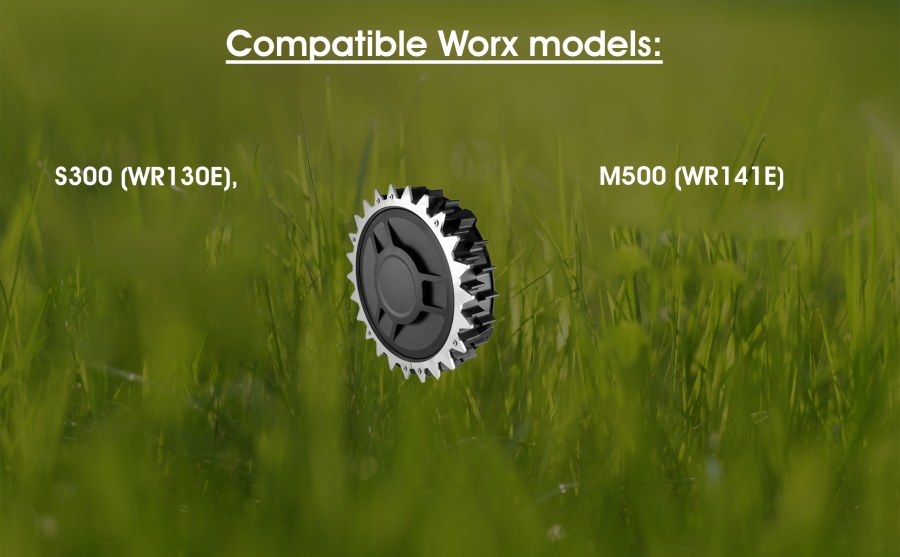
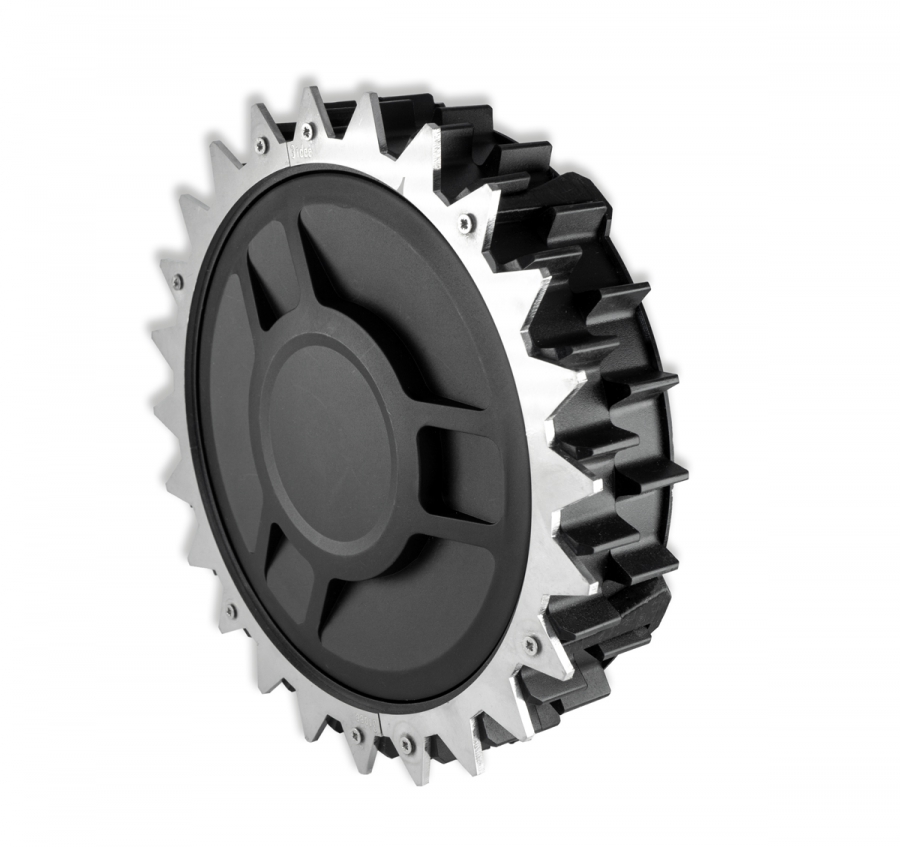

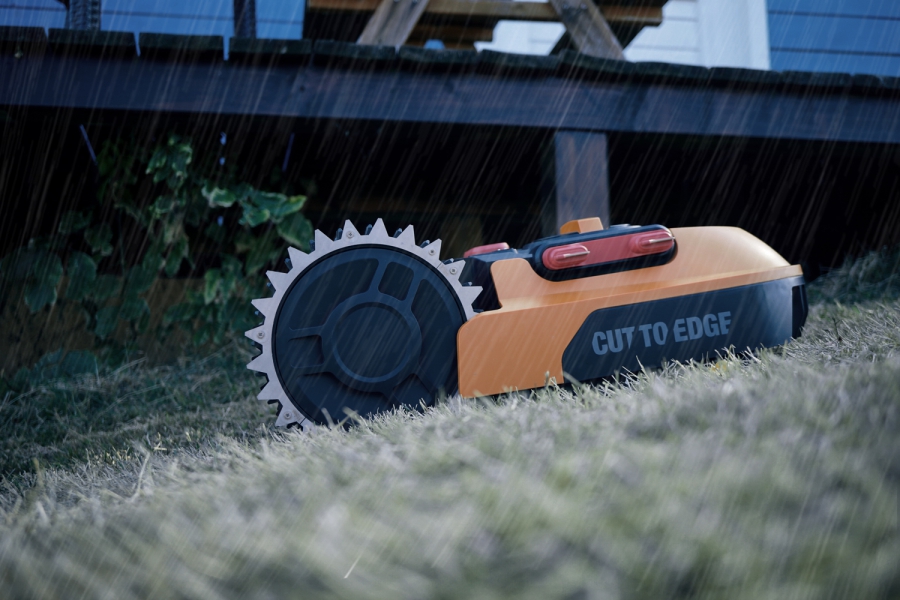
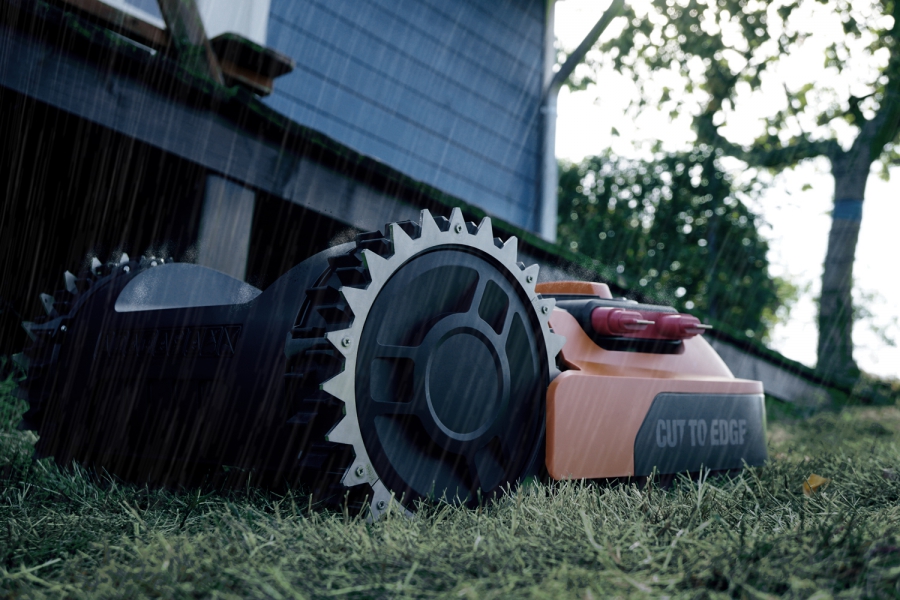
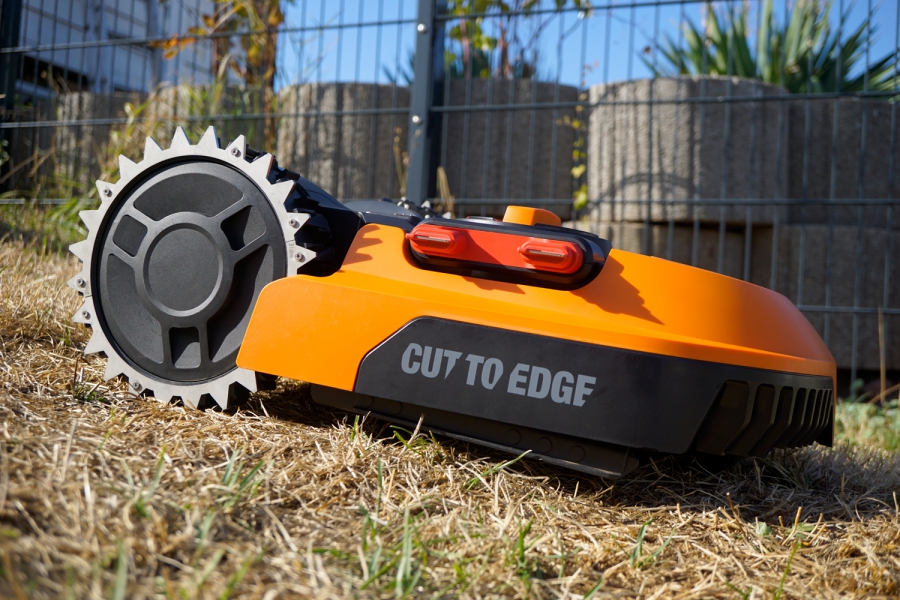
Table of contents
The spikes are compatible with the following products from WORX (eu.worx.com): S300 (WR130E) and M500 (WR141E).
With the robotic mower spikes, you can finally give your WORX brand robotic lawn mower the upgrade it needs.
The 3idee wrx-sm spikes provide a significant traction improvement of your WORX robotic lawnmower and additionally provide sufficient lawn aeration while mowing.
Please note for all M models, the additional steps 4.1 - 4.5 (M models only)
Here you can download the manual as a PDF
The spikes are stainless steel parts, which can be sharp-edged and dangerous. All parts are deburred by us, nevertheless caution is required during assembly. Dangerous cut injuries can occur!
Please keep the components away from children.

(Figure a)
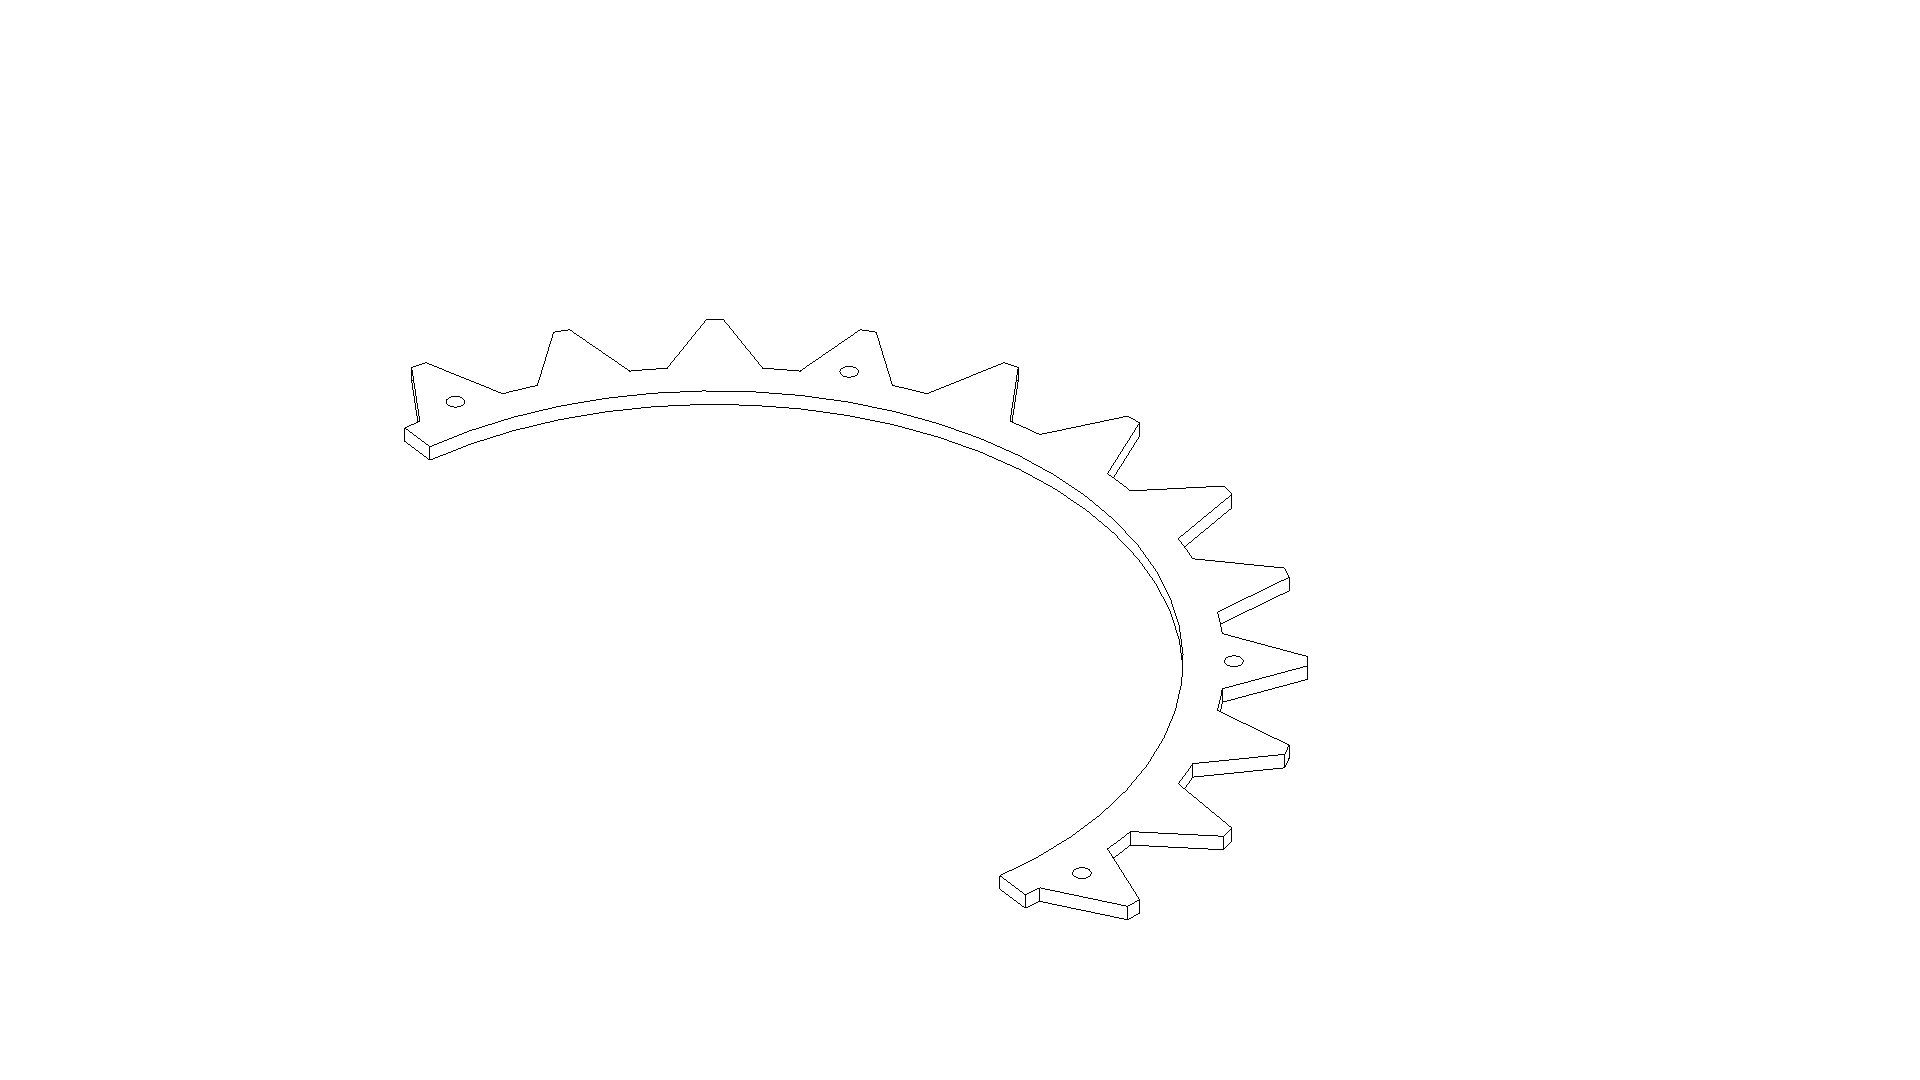 Figure a
(Figure b)
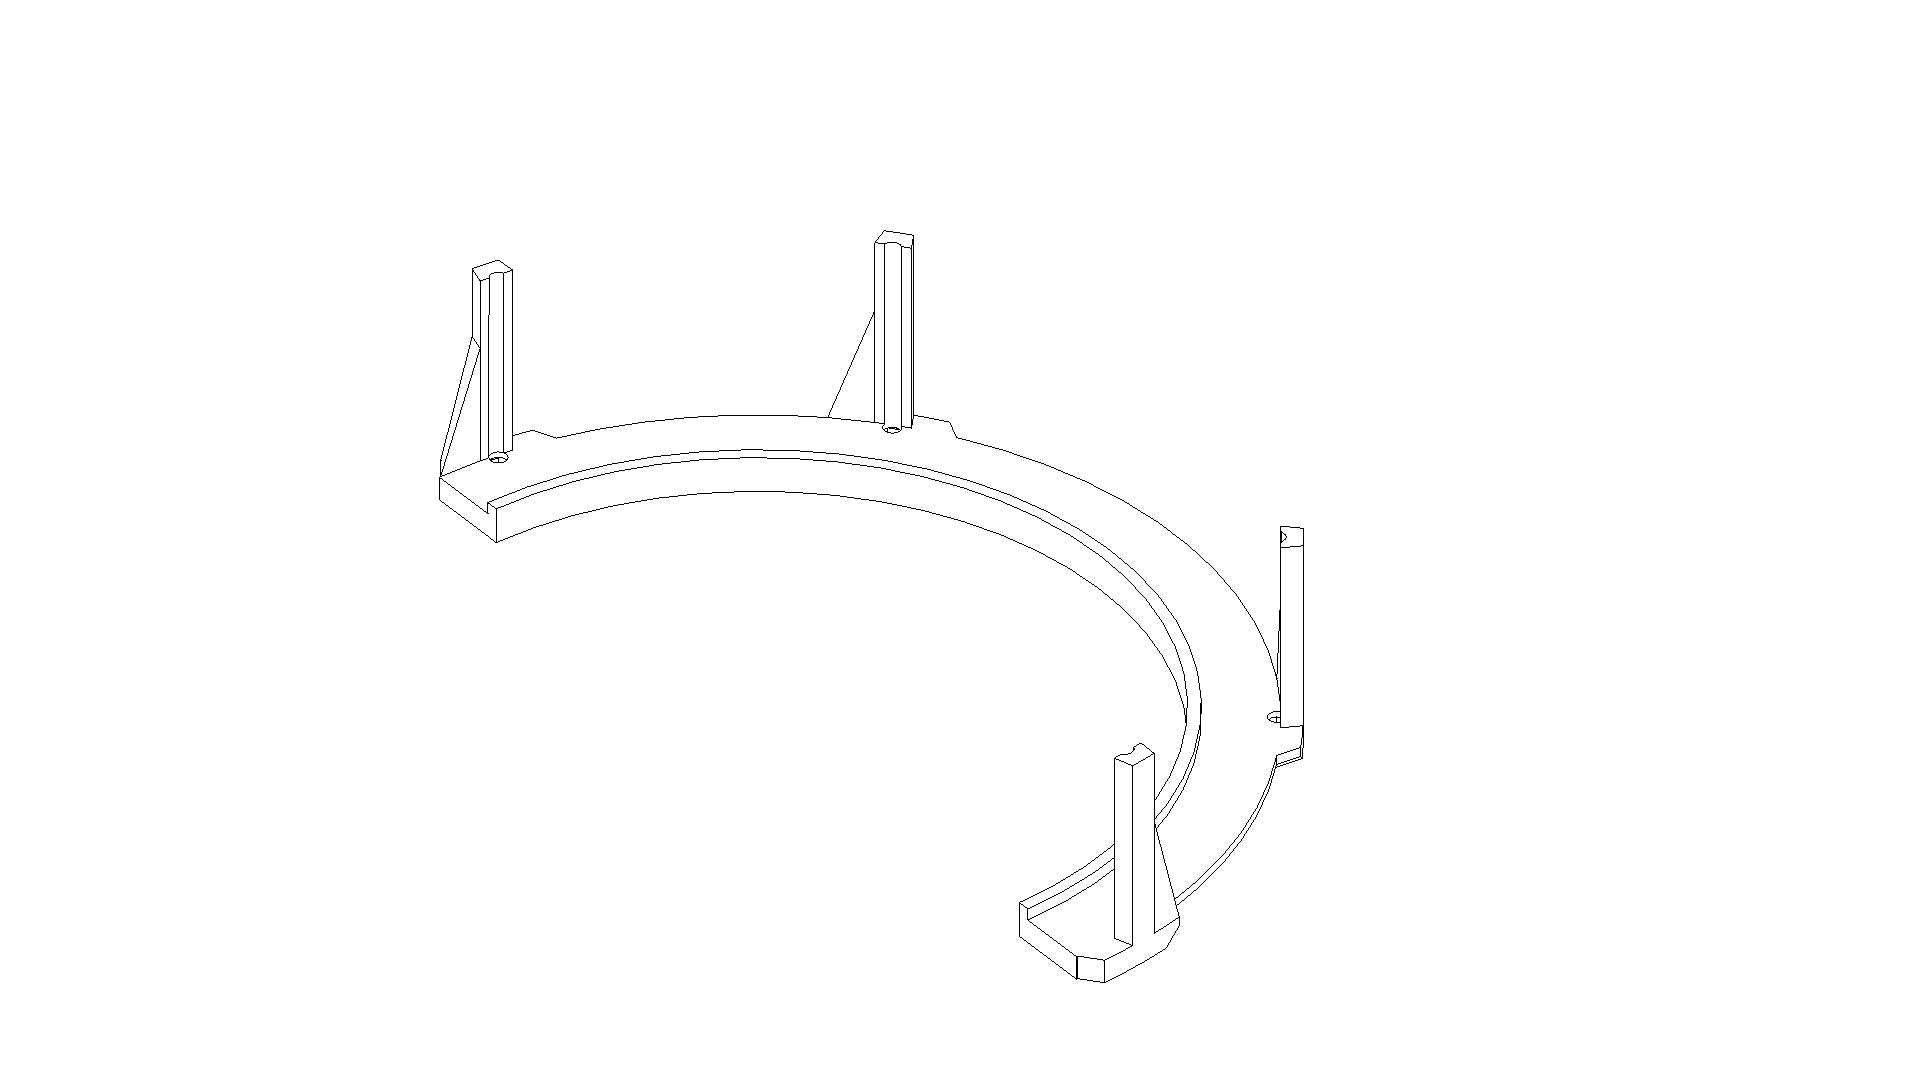 Figure b
16x M3 nut self-locking (pre-assembled by 3idee)
(Figure c)
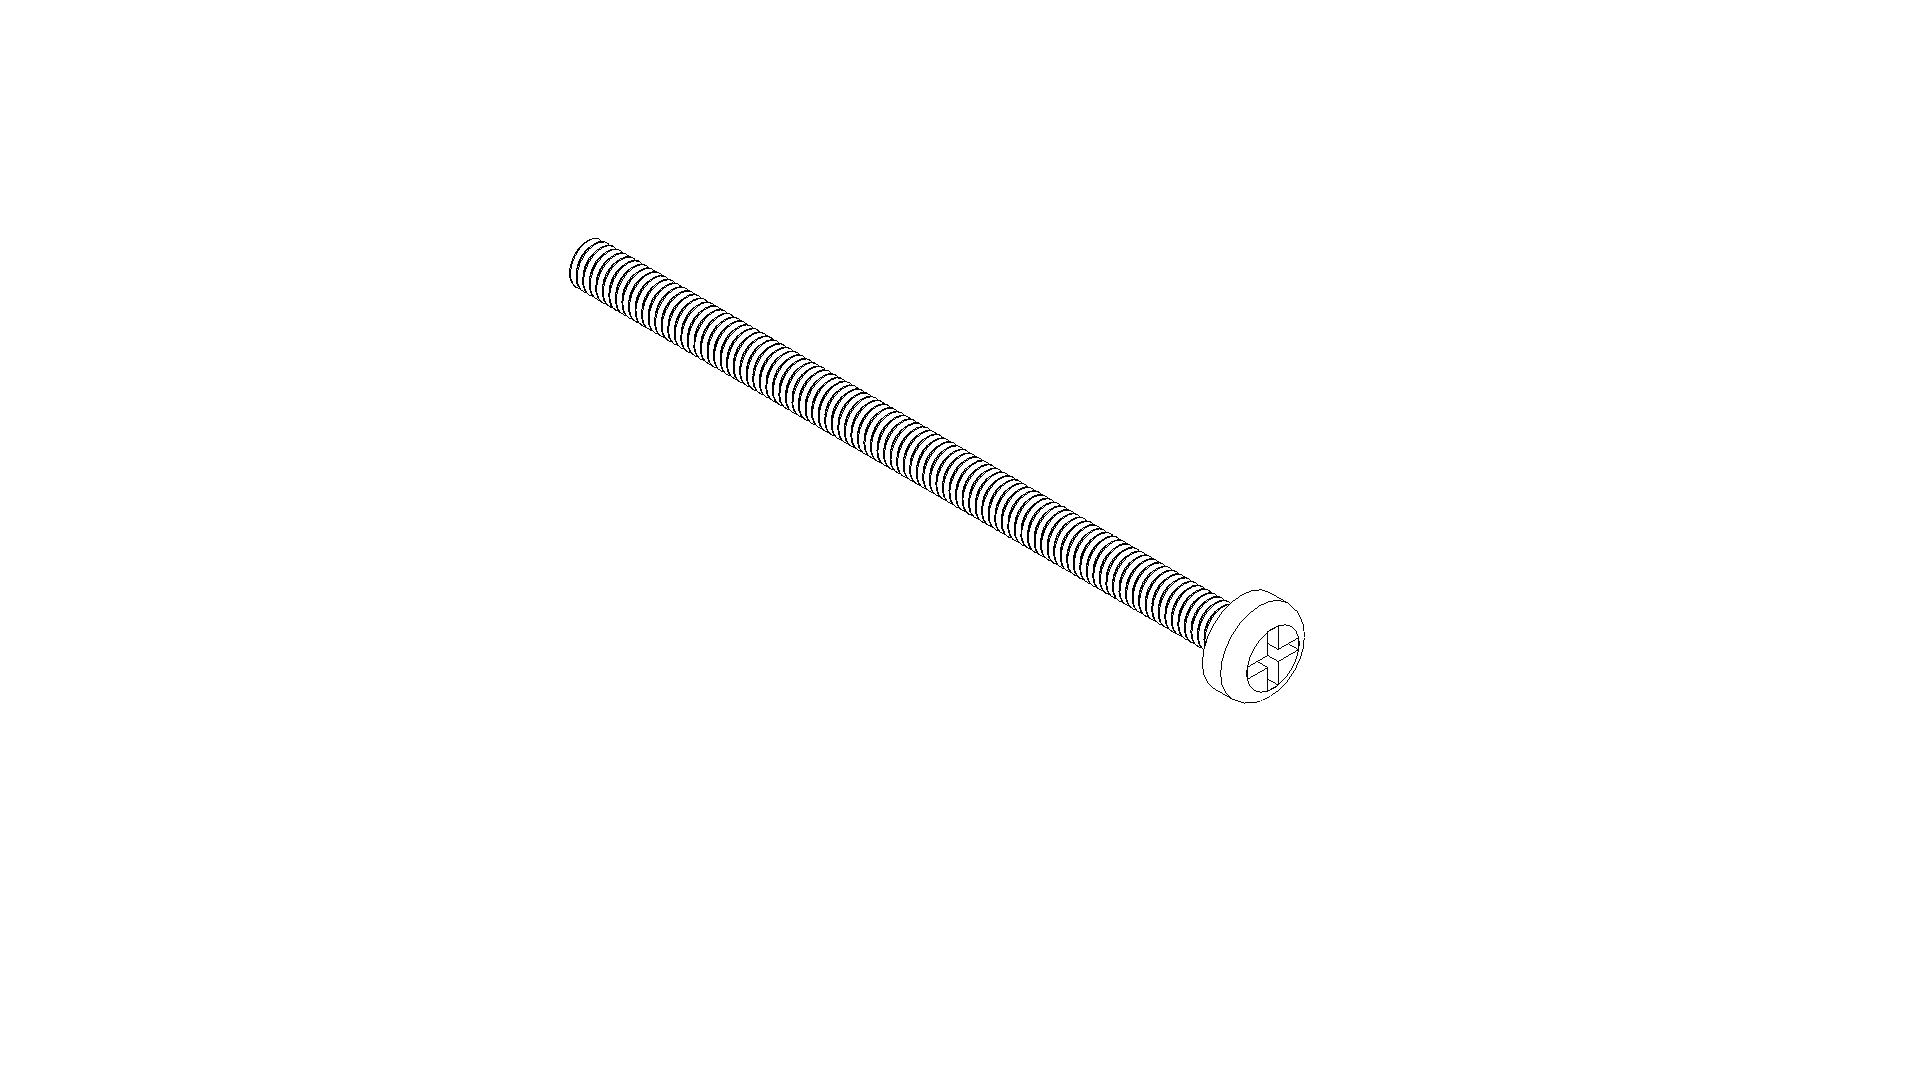 Figure c
(Figure d)
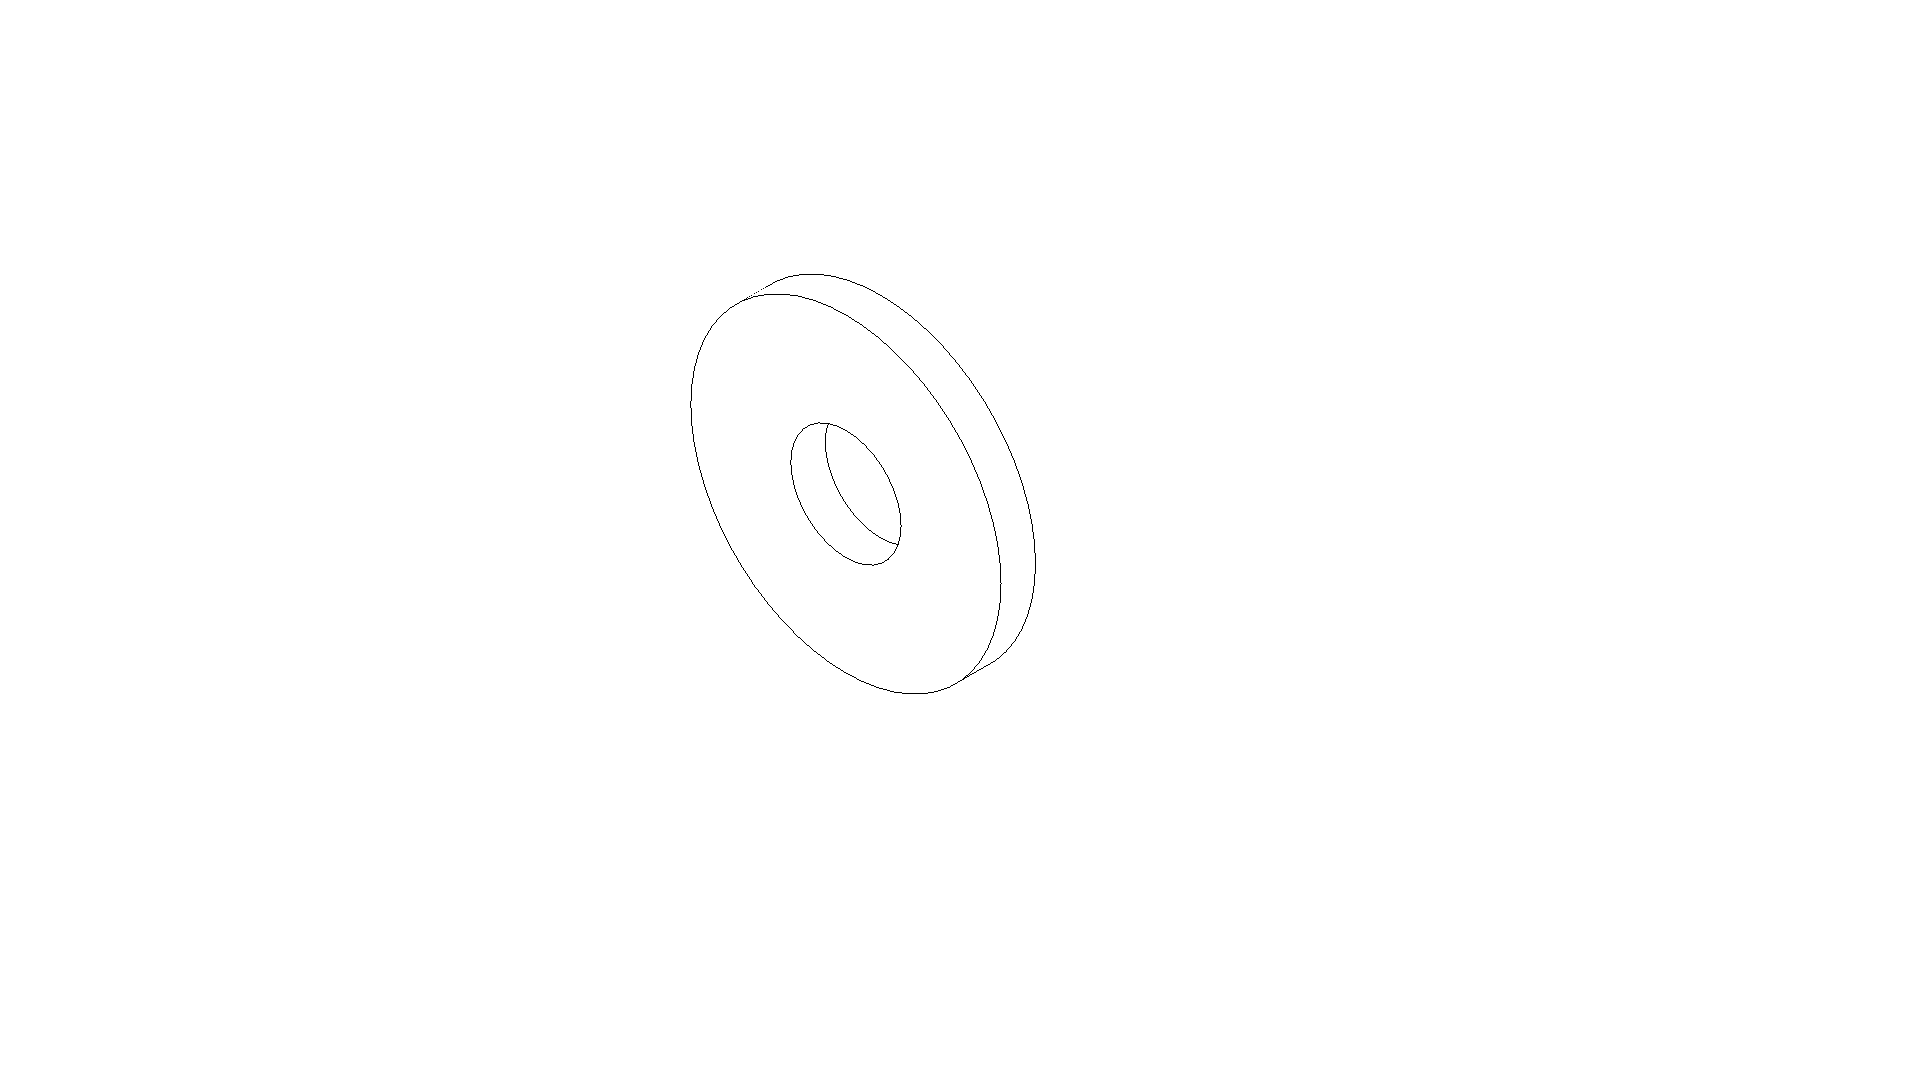 Figure d
(Figure e)
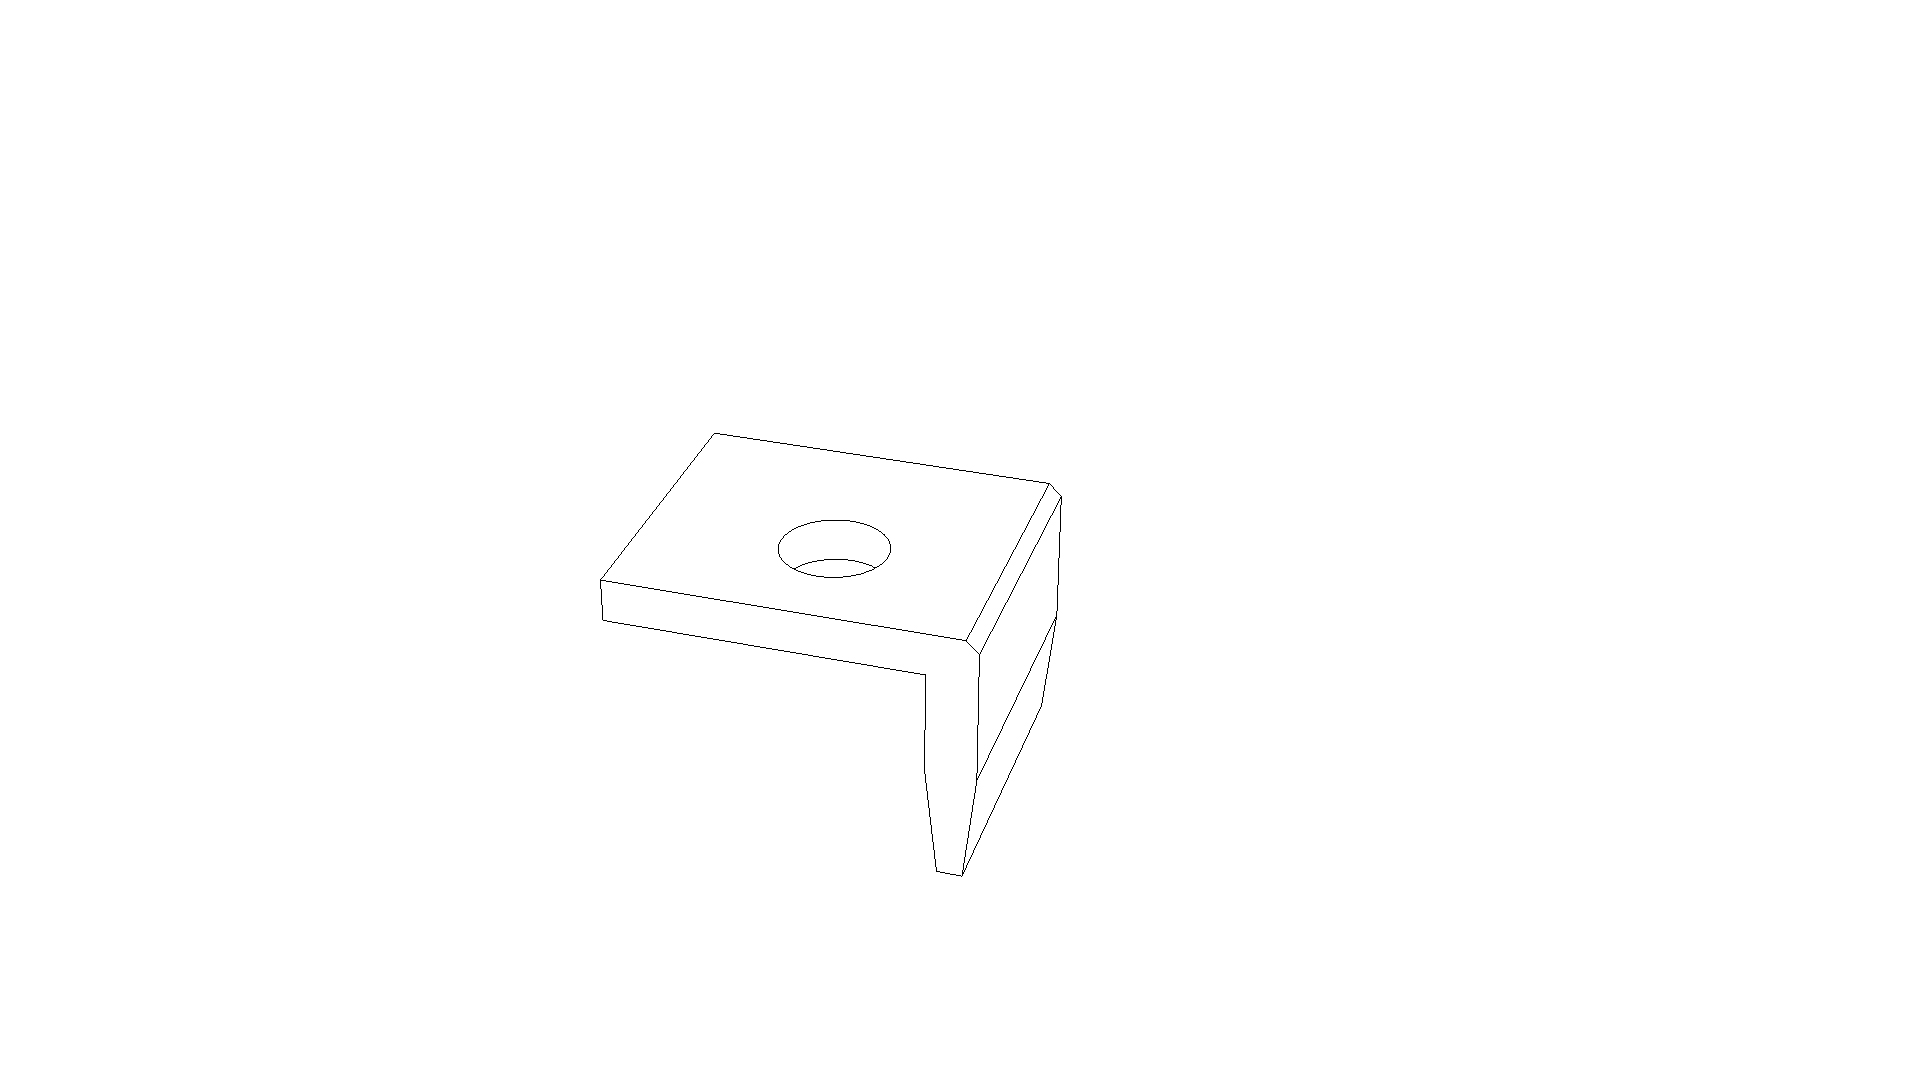 Figure e
We recommend that you place your WORX robotic lawnmower on your lawn for installation so as not to damage any surface.
Remove the hub cap from the wheels. We recommend a flat screwdriver for this step. (Figure 1)
Important: Place the screwdriver on the 3 points marked with the arrow on the hubcap. There are notches on the back of the hubcap that make it easier to remove.
Repeat this step for the second wheel.
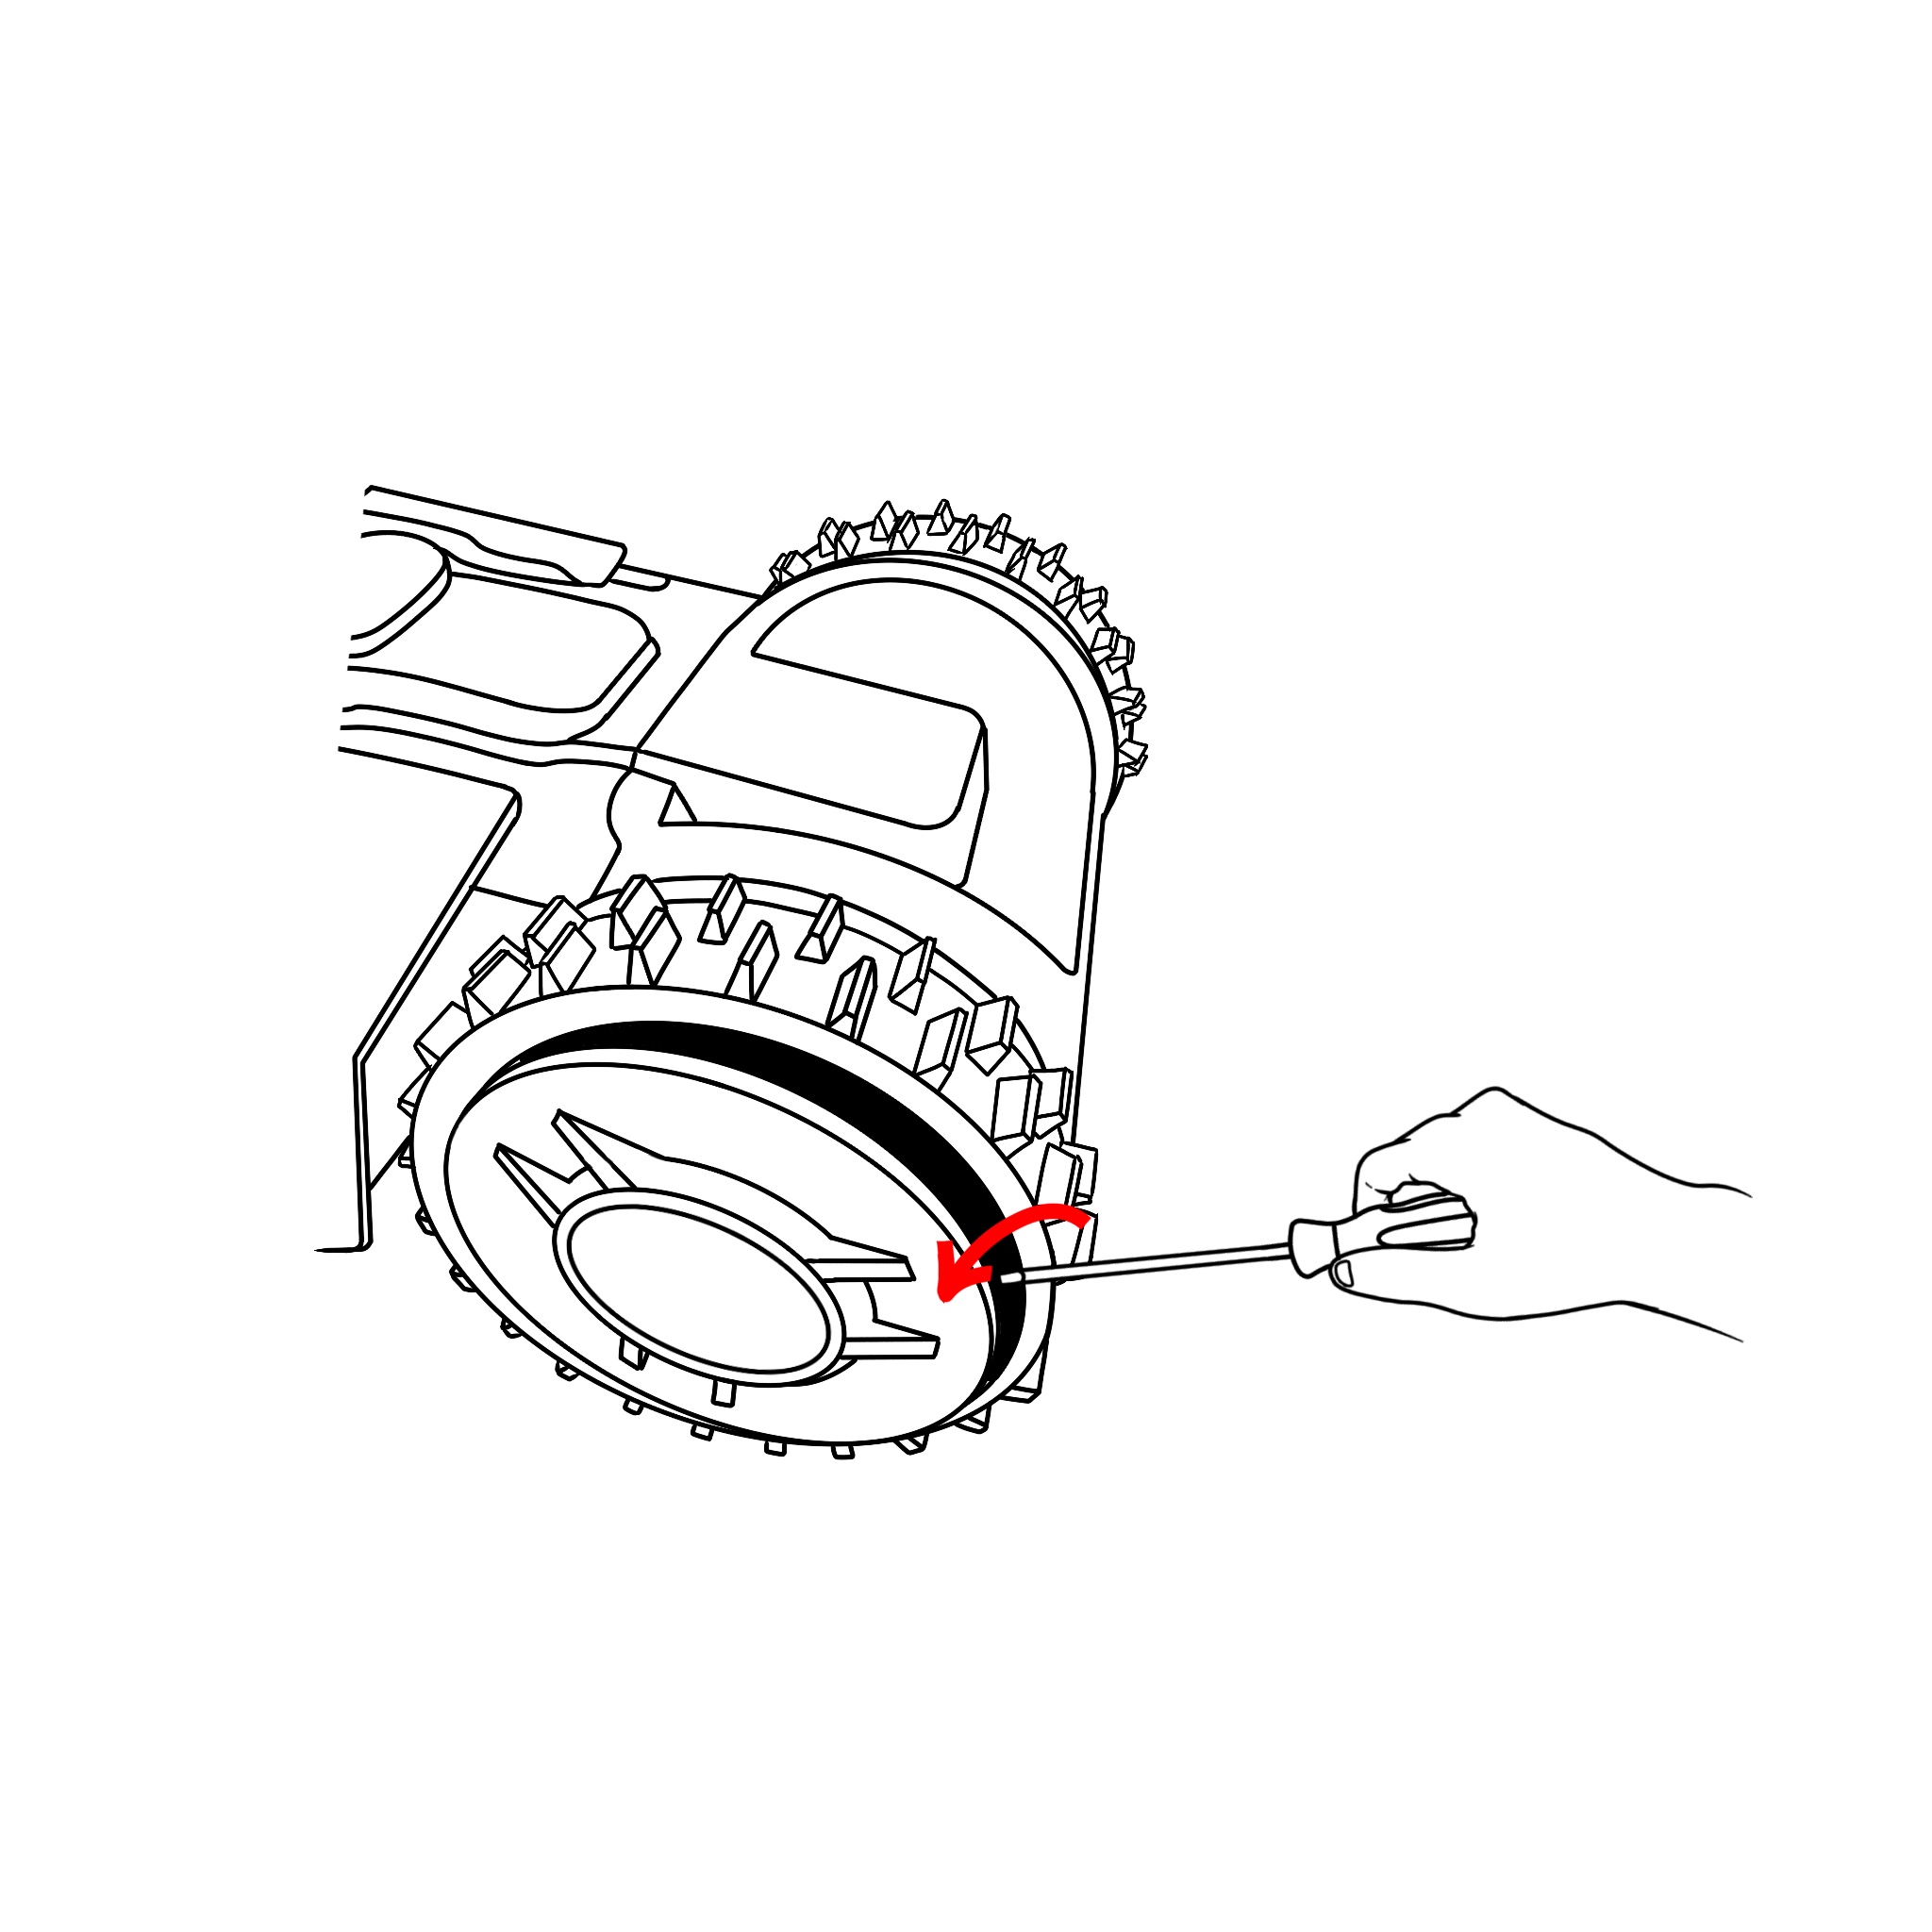 Figure 1
2a: Loosen the hex nut by turning it to the left to remove the wheel. Use a 16mm box wrench to do this.
2b: Remove the nut.
2c: Remove the large black washer as well.
2d: Now pull the wheel off the thread.
(Figure 2)
Repeat this step for the second wheel.
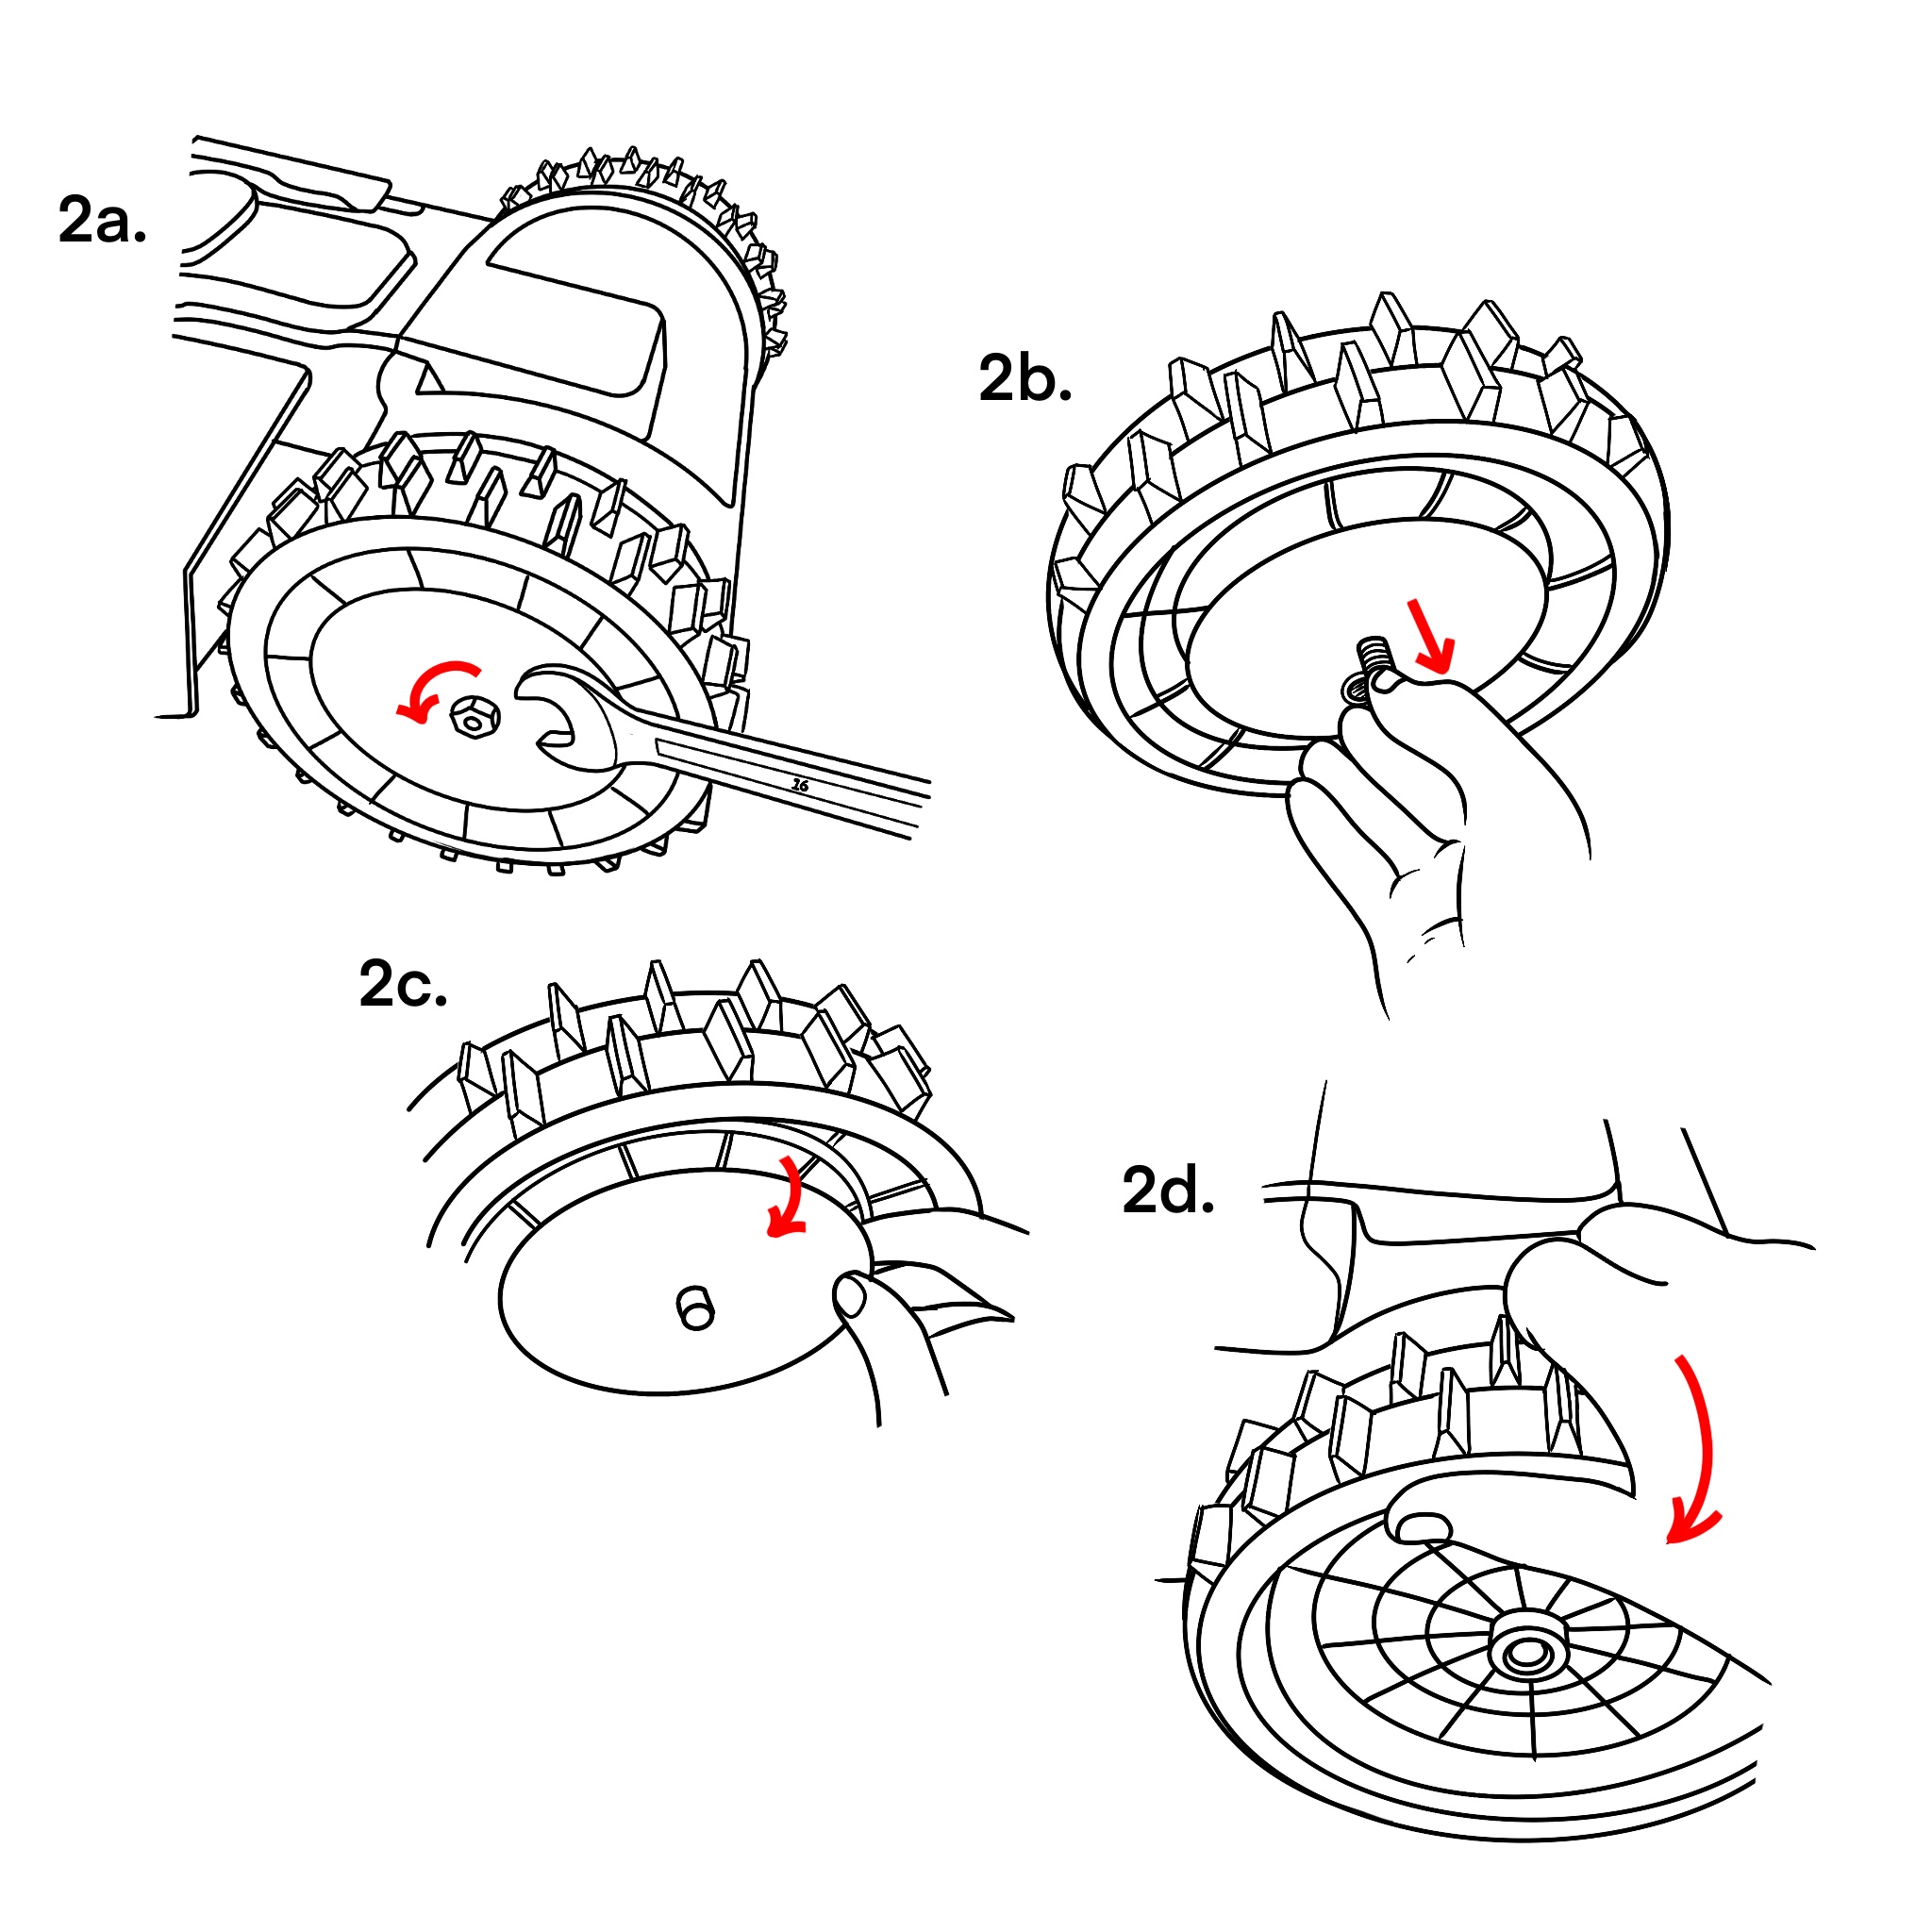 Figure 2
3a: Put the plastic holder between the tire tread on the wheel. Make sure you find the right position.
3b: Correctly mounted, the two holders should form a circle.
Repeat this step for the second wheel.
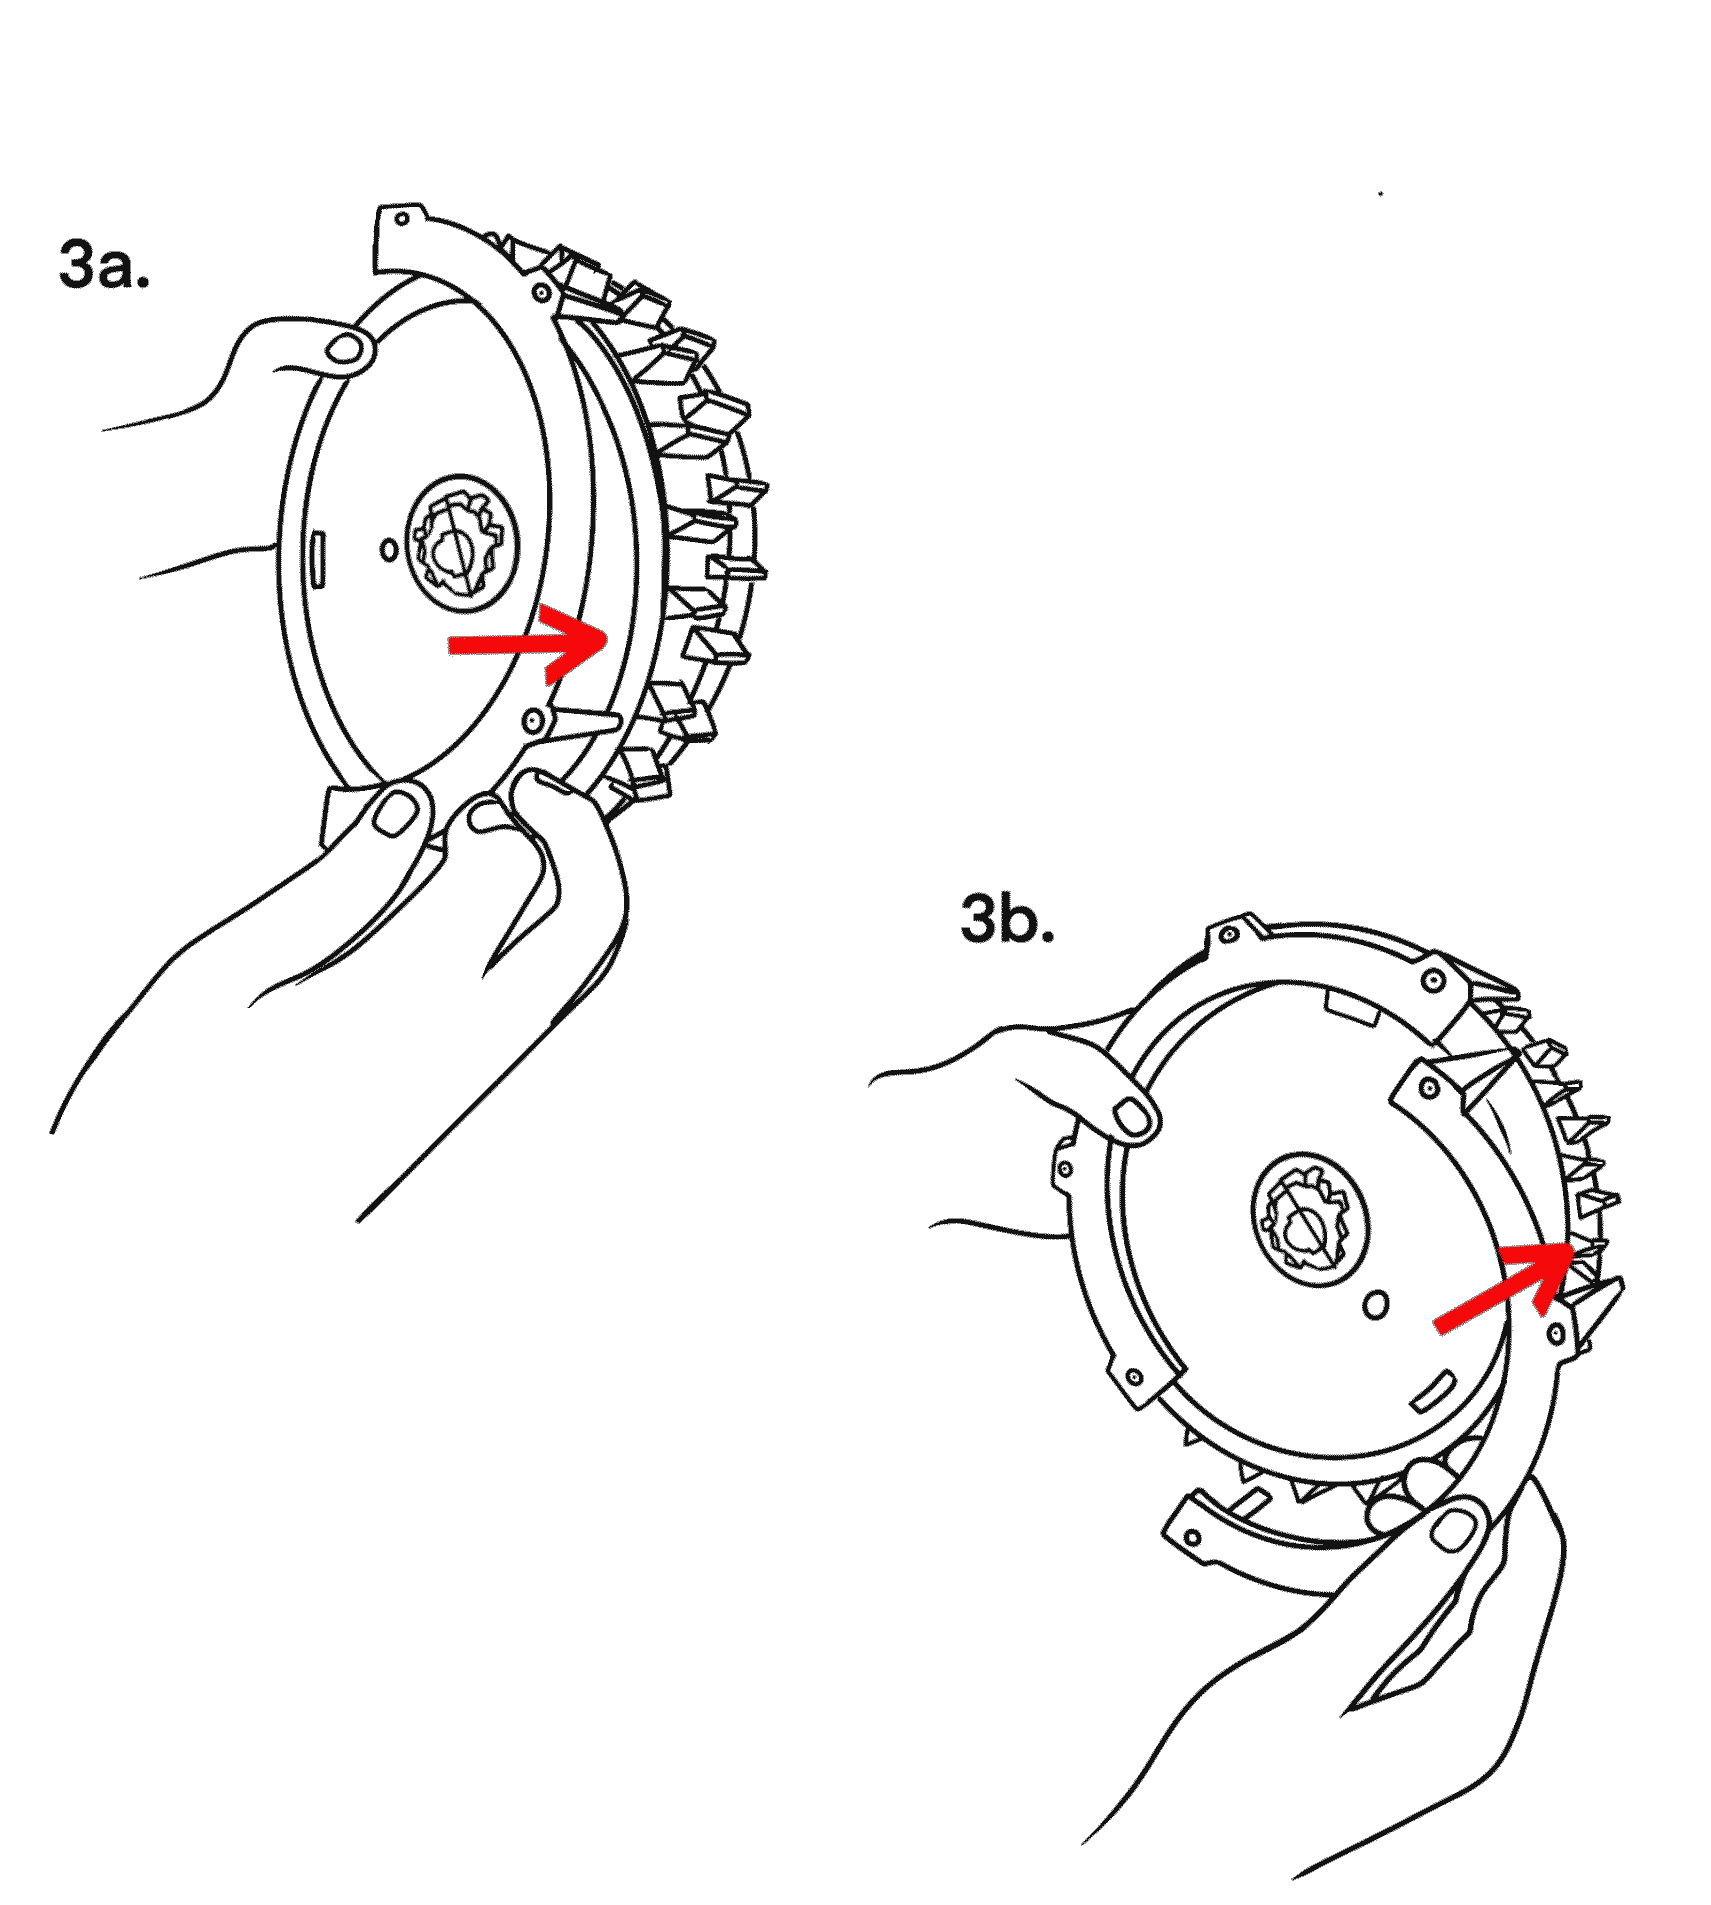
Turn the wheel so that the front is facing you again.
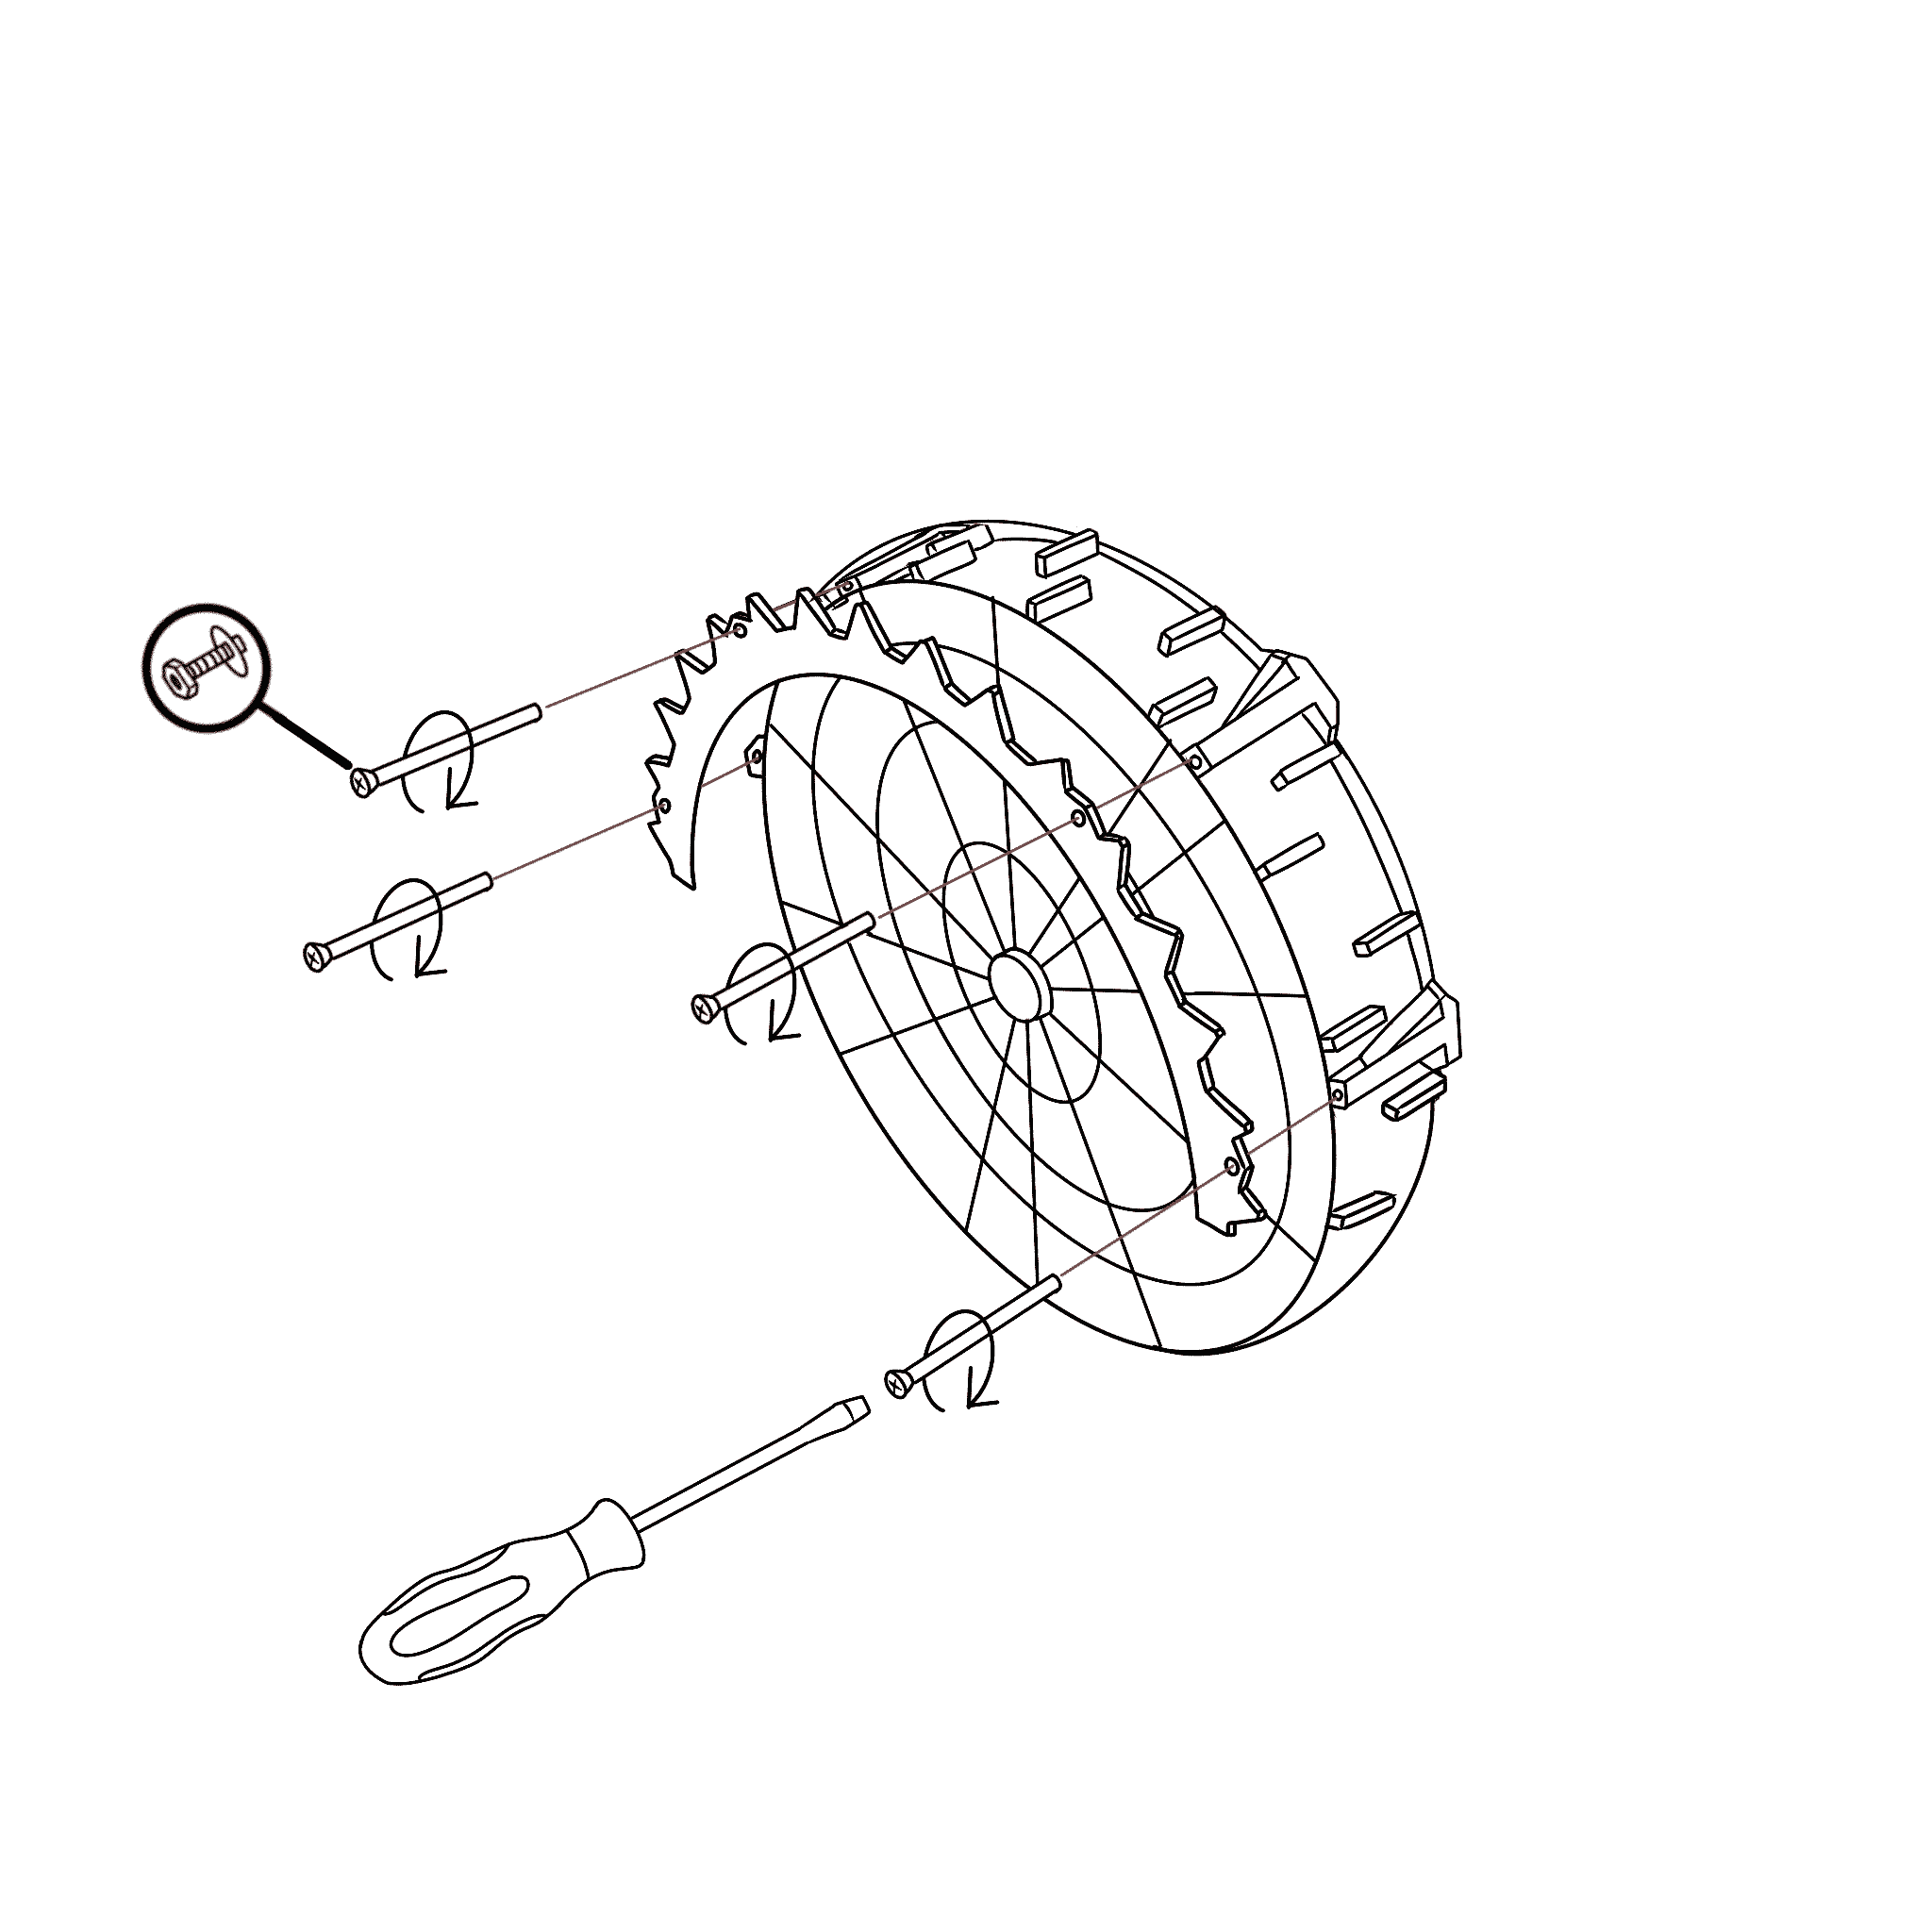
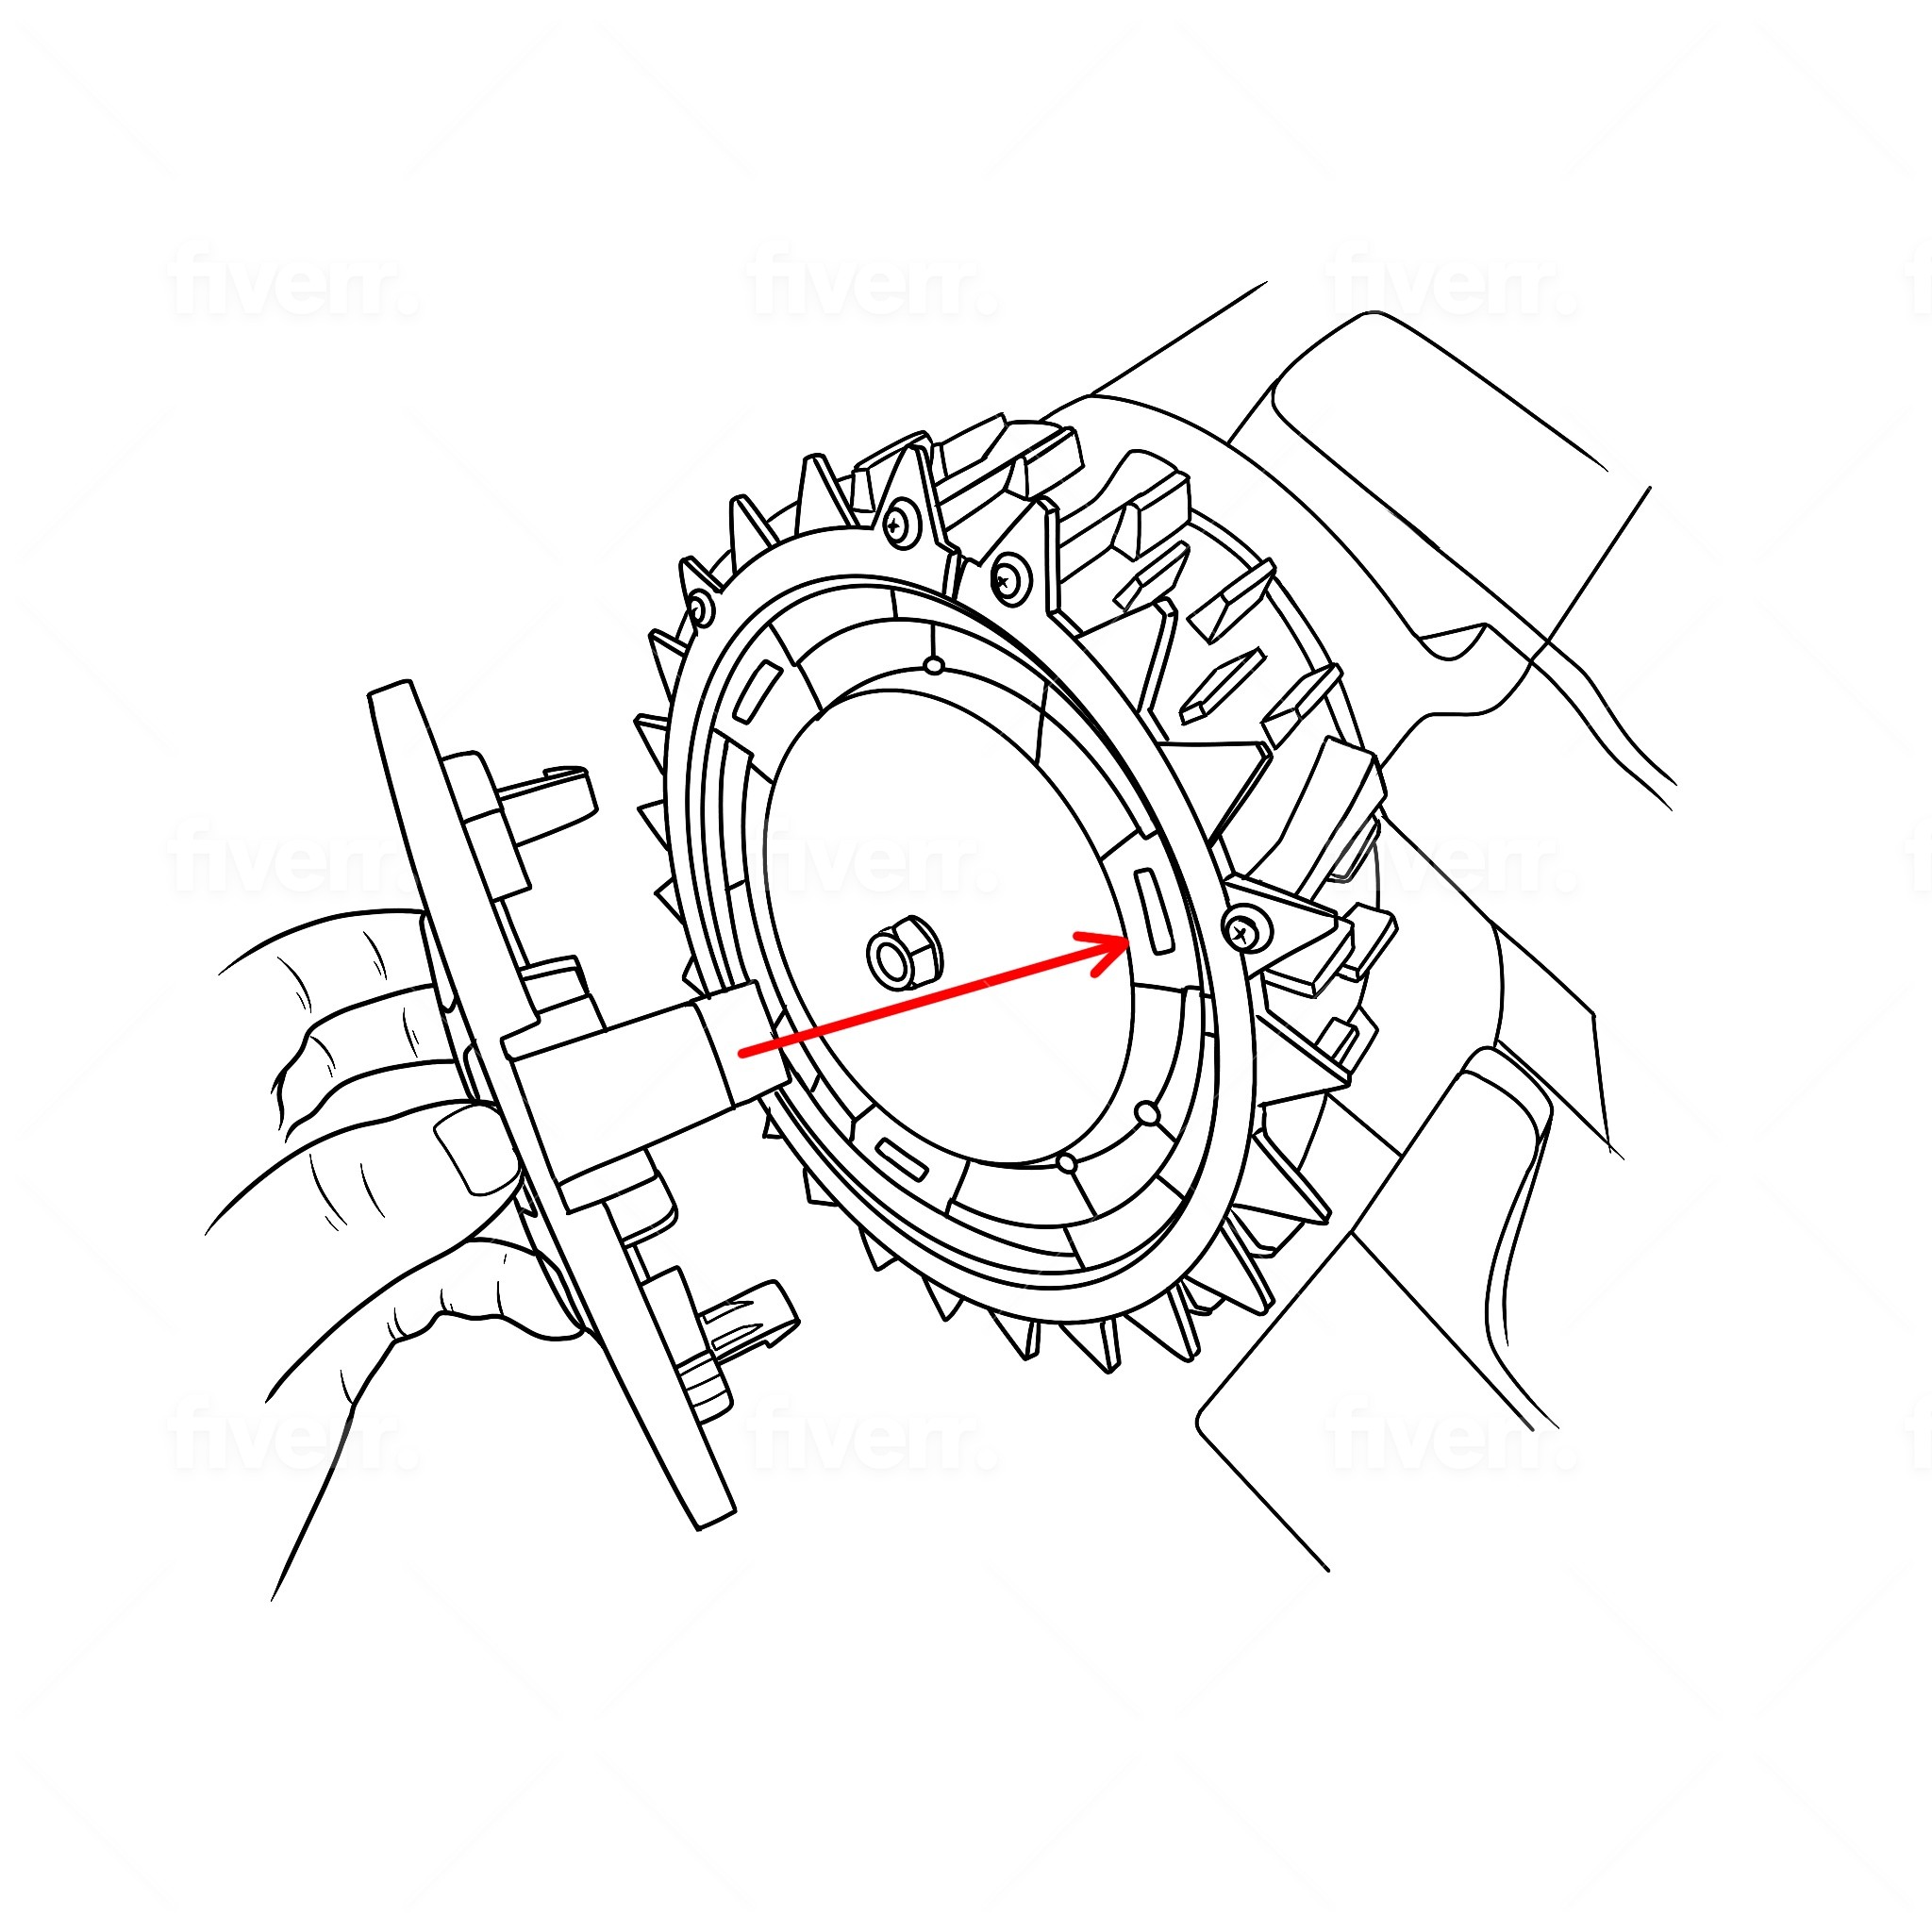
Now place the stainless steel spikes on the wheel and make sure that all holes match the rear holder. This is important because the holes are not the same distance from each other.
Take 4x the supplied screws (M3x50) + washer and put them through the stainless steel spikes, as well as the holes of the bracket to connect them to the bracket.
Important: Make sure that each screw has a washer.
You can then add the stainless steel spikes to the other half of the wheel.
Repeat this step for the second wheel.
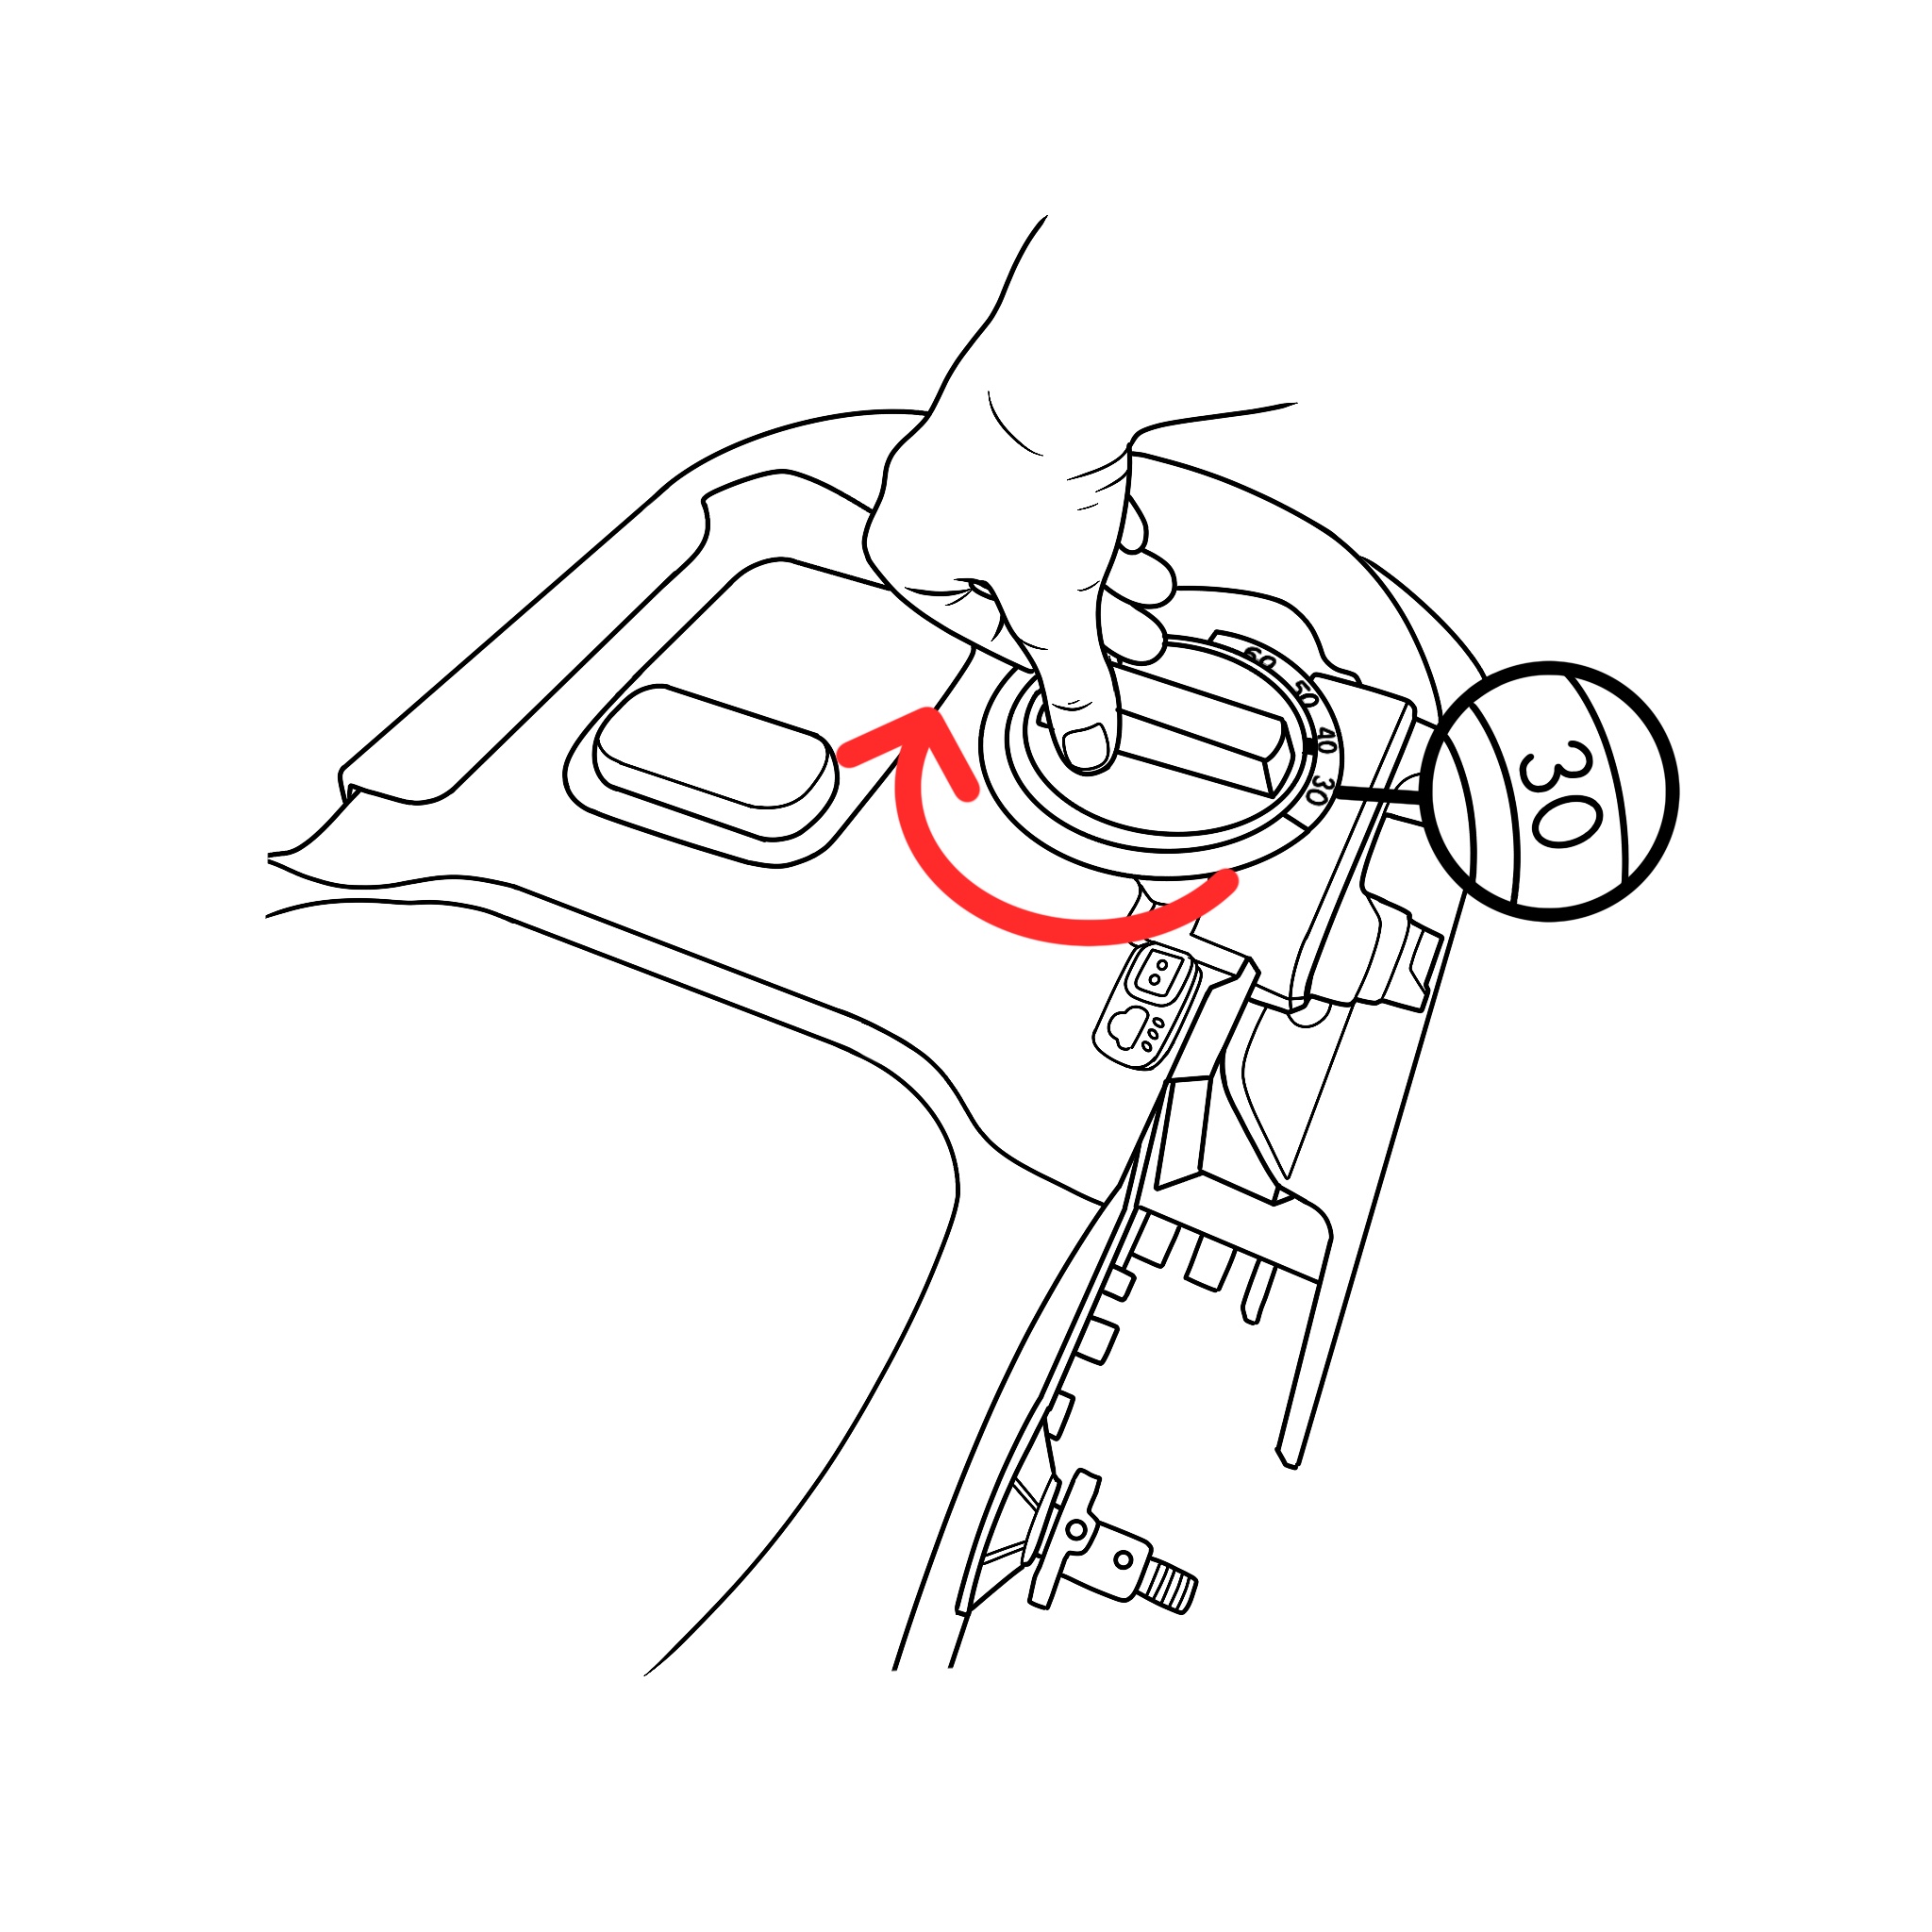
This step is only for the following models: M500 (WR141E), M500 Plus (WR165E), M700 (WR142E), M700 Plus (WR167E), M800i (WG757E), M800i (WR111 MI), M900 (WG758E), M1000i (WG796E.1), M1200i (WG799E).
Turn the height of the mower to level 30.
This step is only for the following models:
M500 (WR141E), M500 Plus (WR165E), M700 (WR142E), M700 Plus (WR167E), M800i (WG757E), M800i (WR111 MI), M900 (WG758E), M1000i (WG796E.1), M1200i (WG799E).
a) Now turn your WORX 180° so that it is upside down.
b) There is the black rubber part which should be dismantled.
c) For safety, please put a towel on the blades of the mower to minimize the risk of injury.

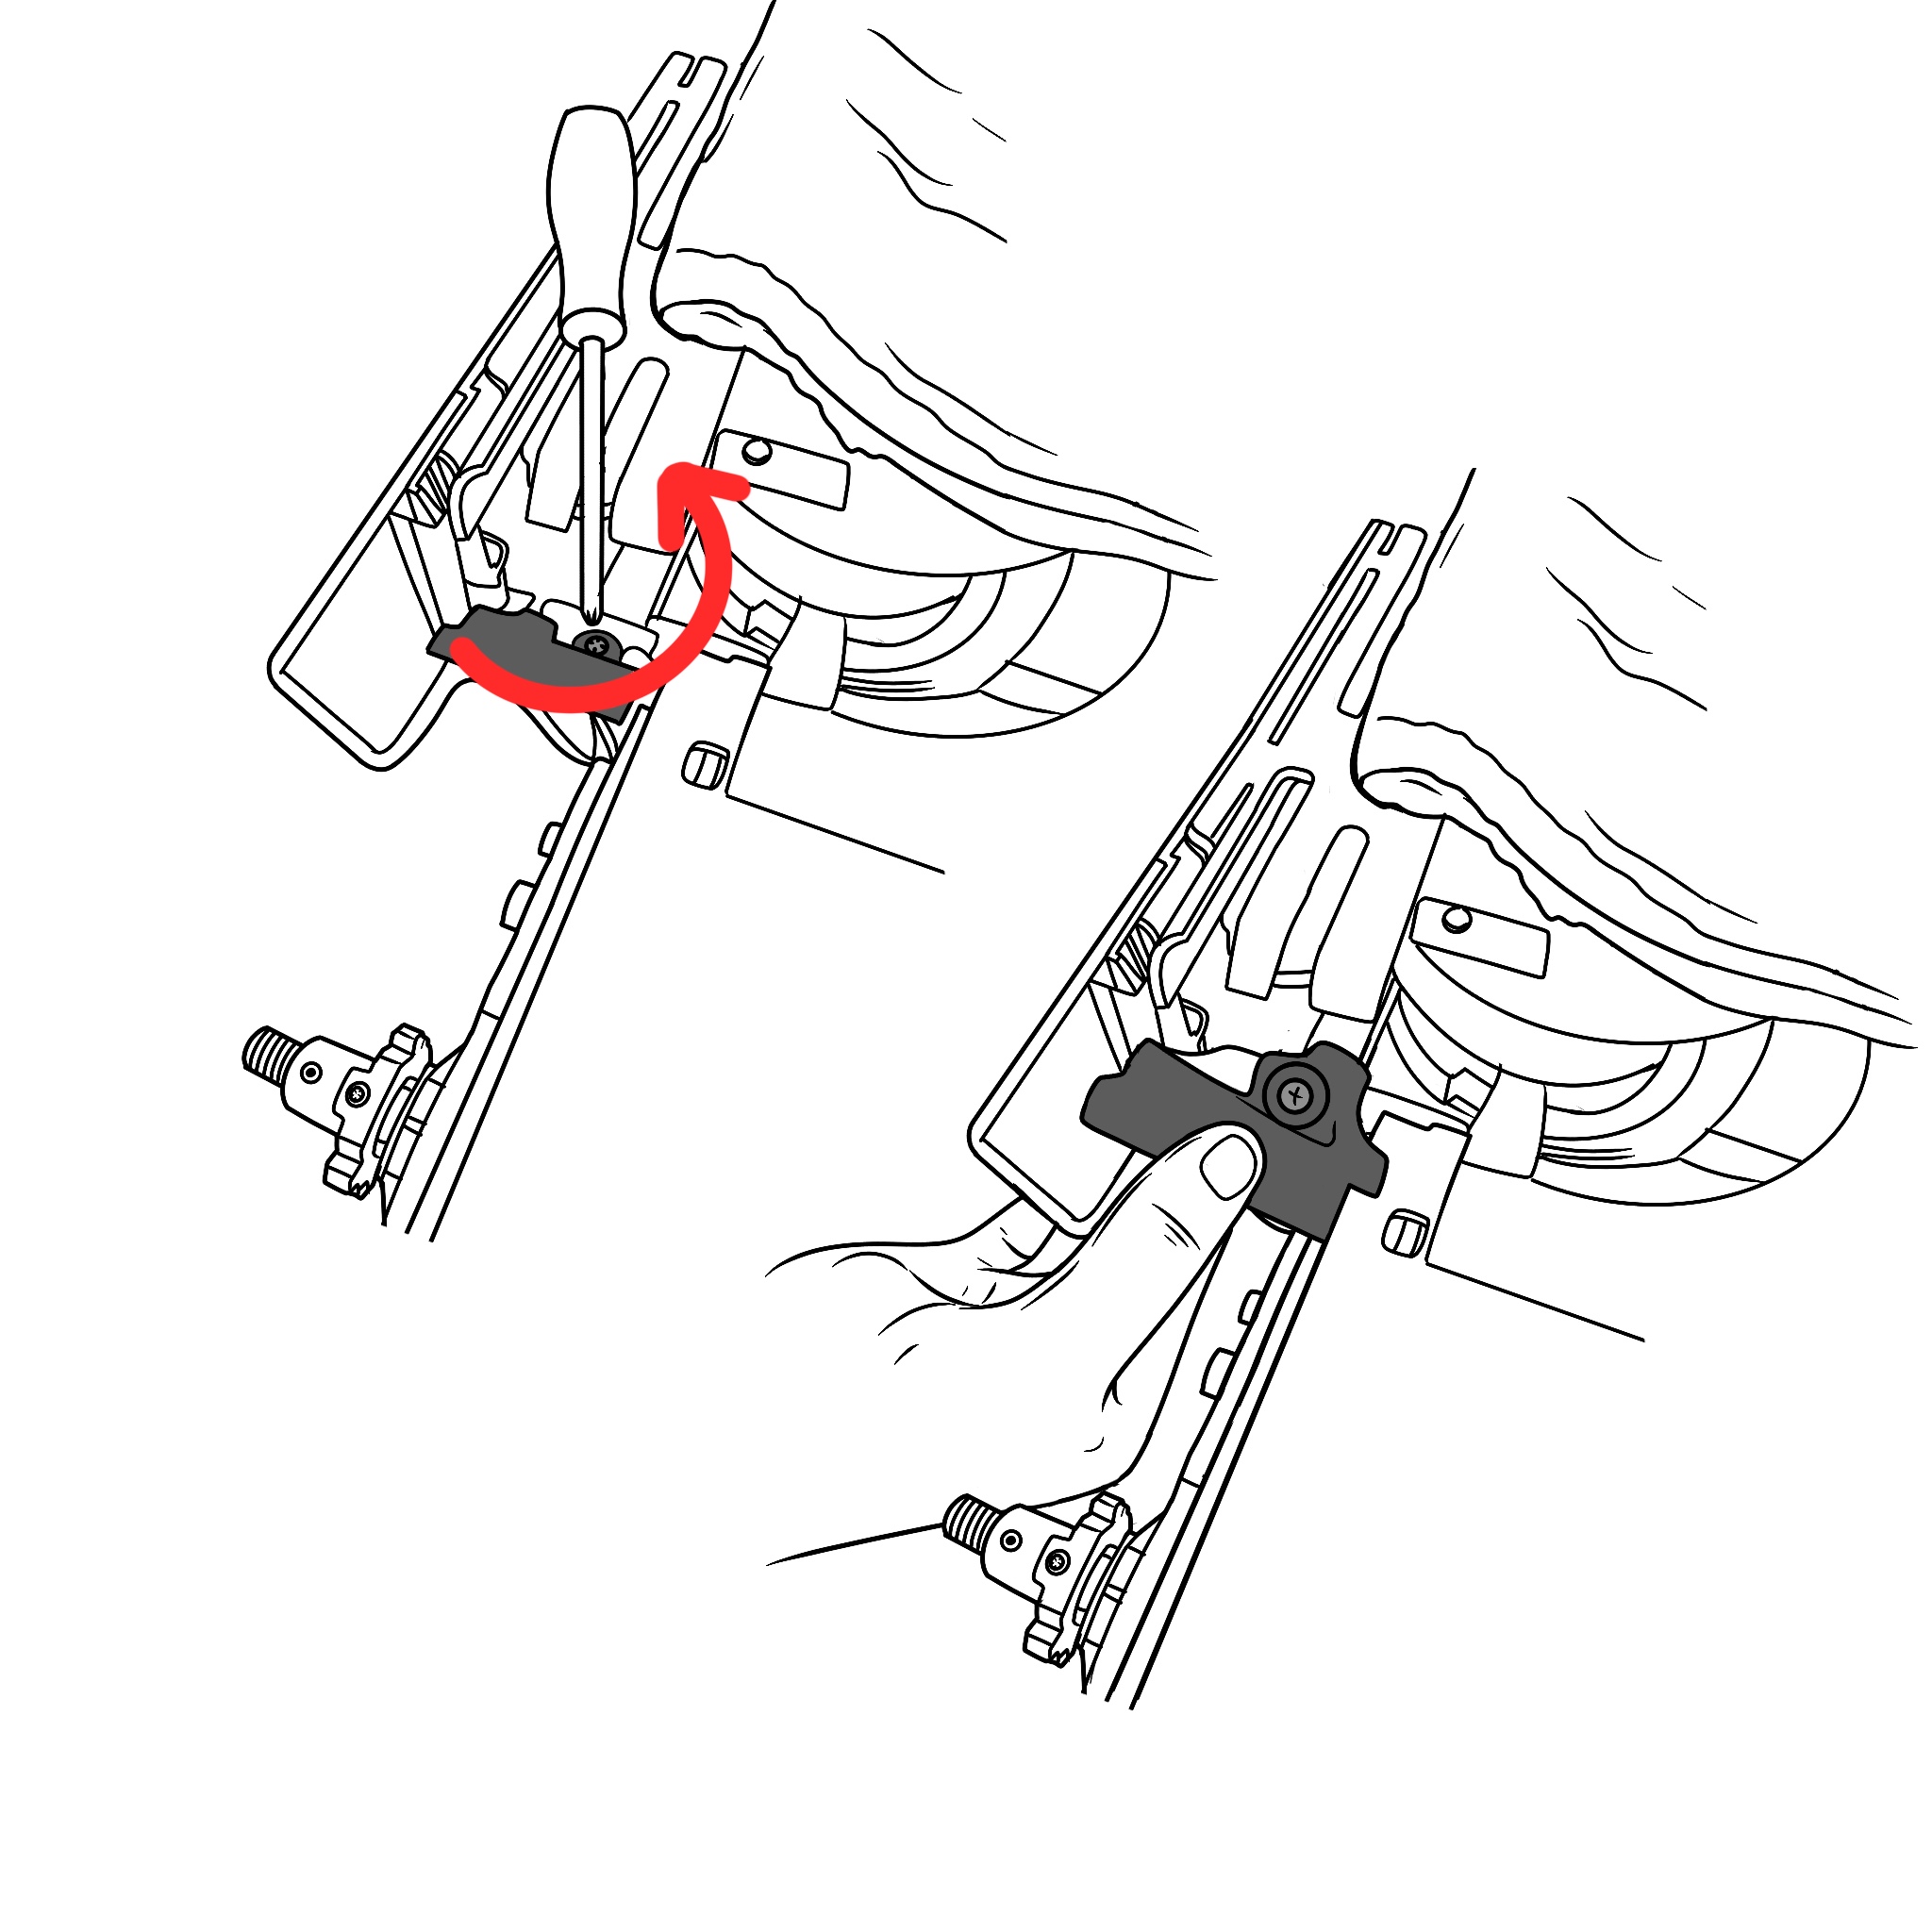
This step is only for the following models:
M500 (WR141E), M500 Plus (WR165E), M700 (WR142E), M700 Plus (WR167E), M800i (WG757E), M800i (WR111 MI), M900 (WG758E), M1000i (WG796E.1), M1200i (WG799E).
a) Now take a Phillips screwdriver and loosen the screw that fixes the black rubber part.
b) Now you can remove the black rubber part.
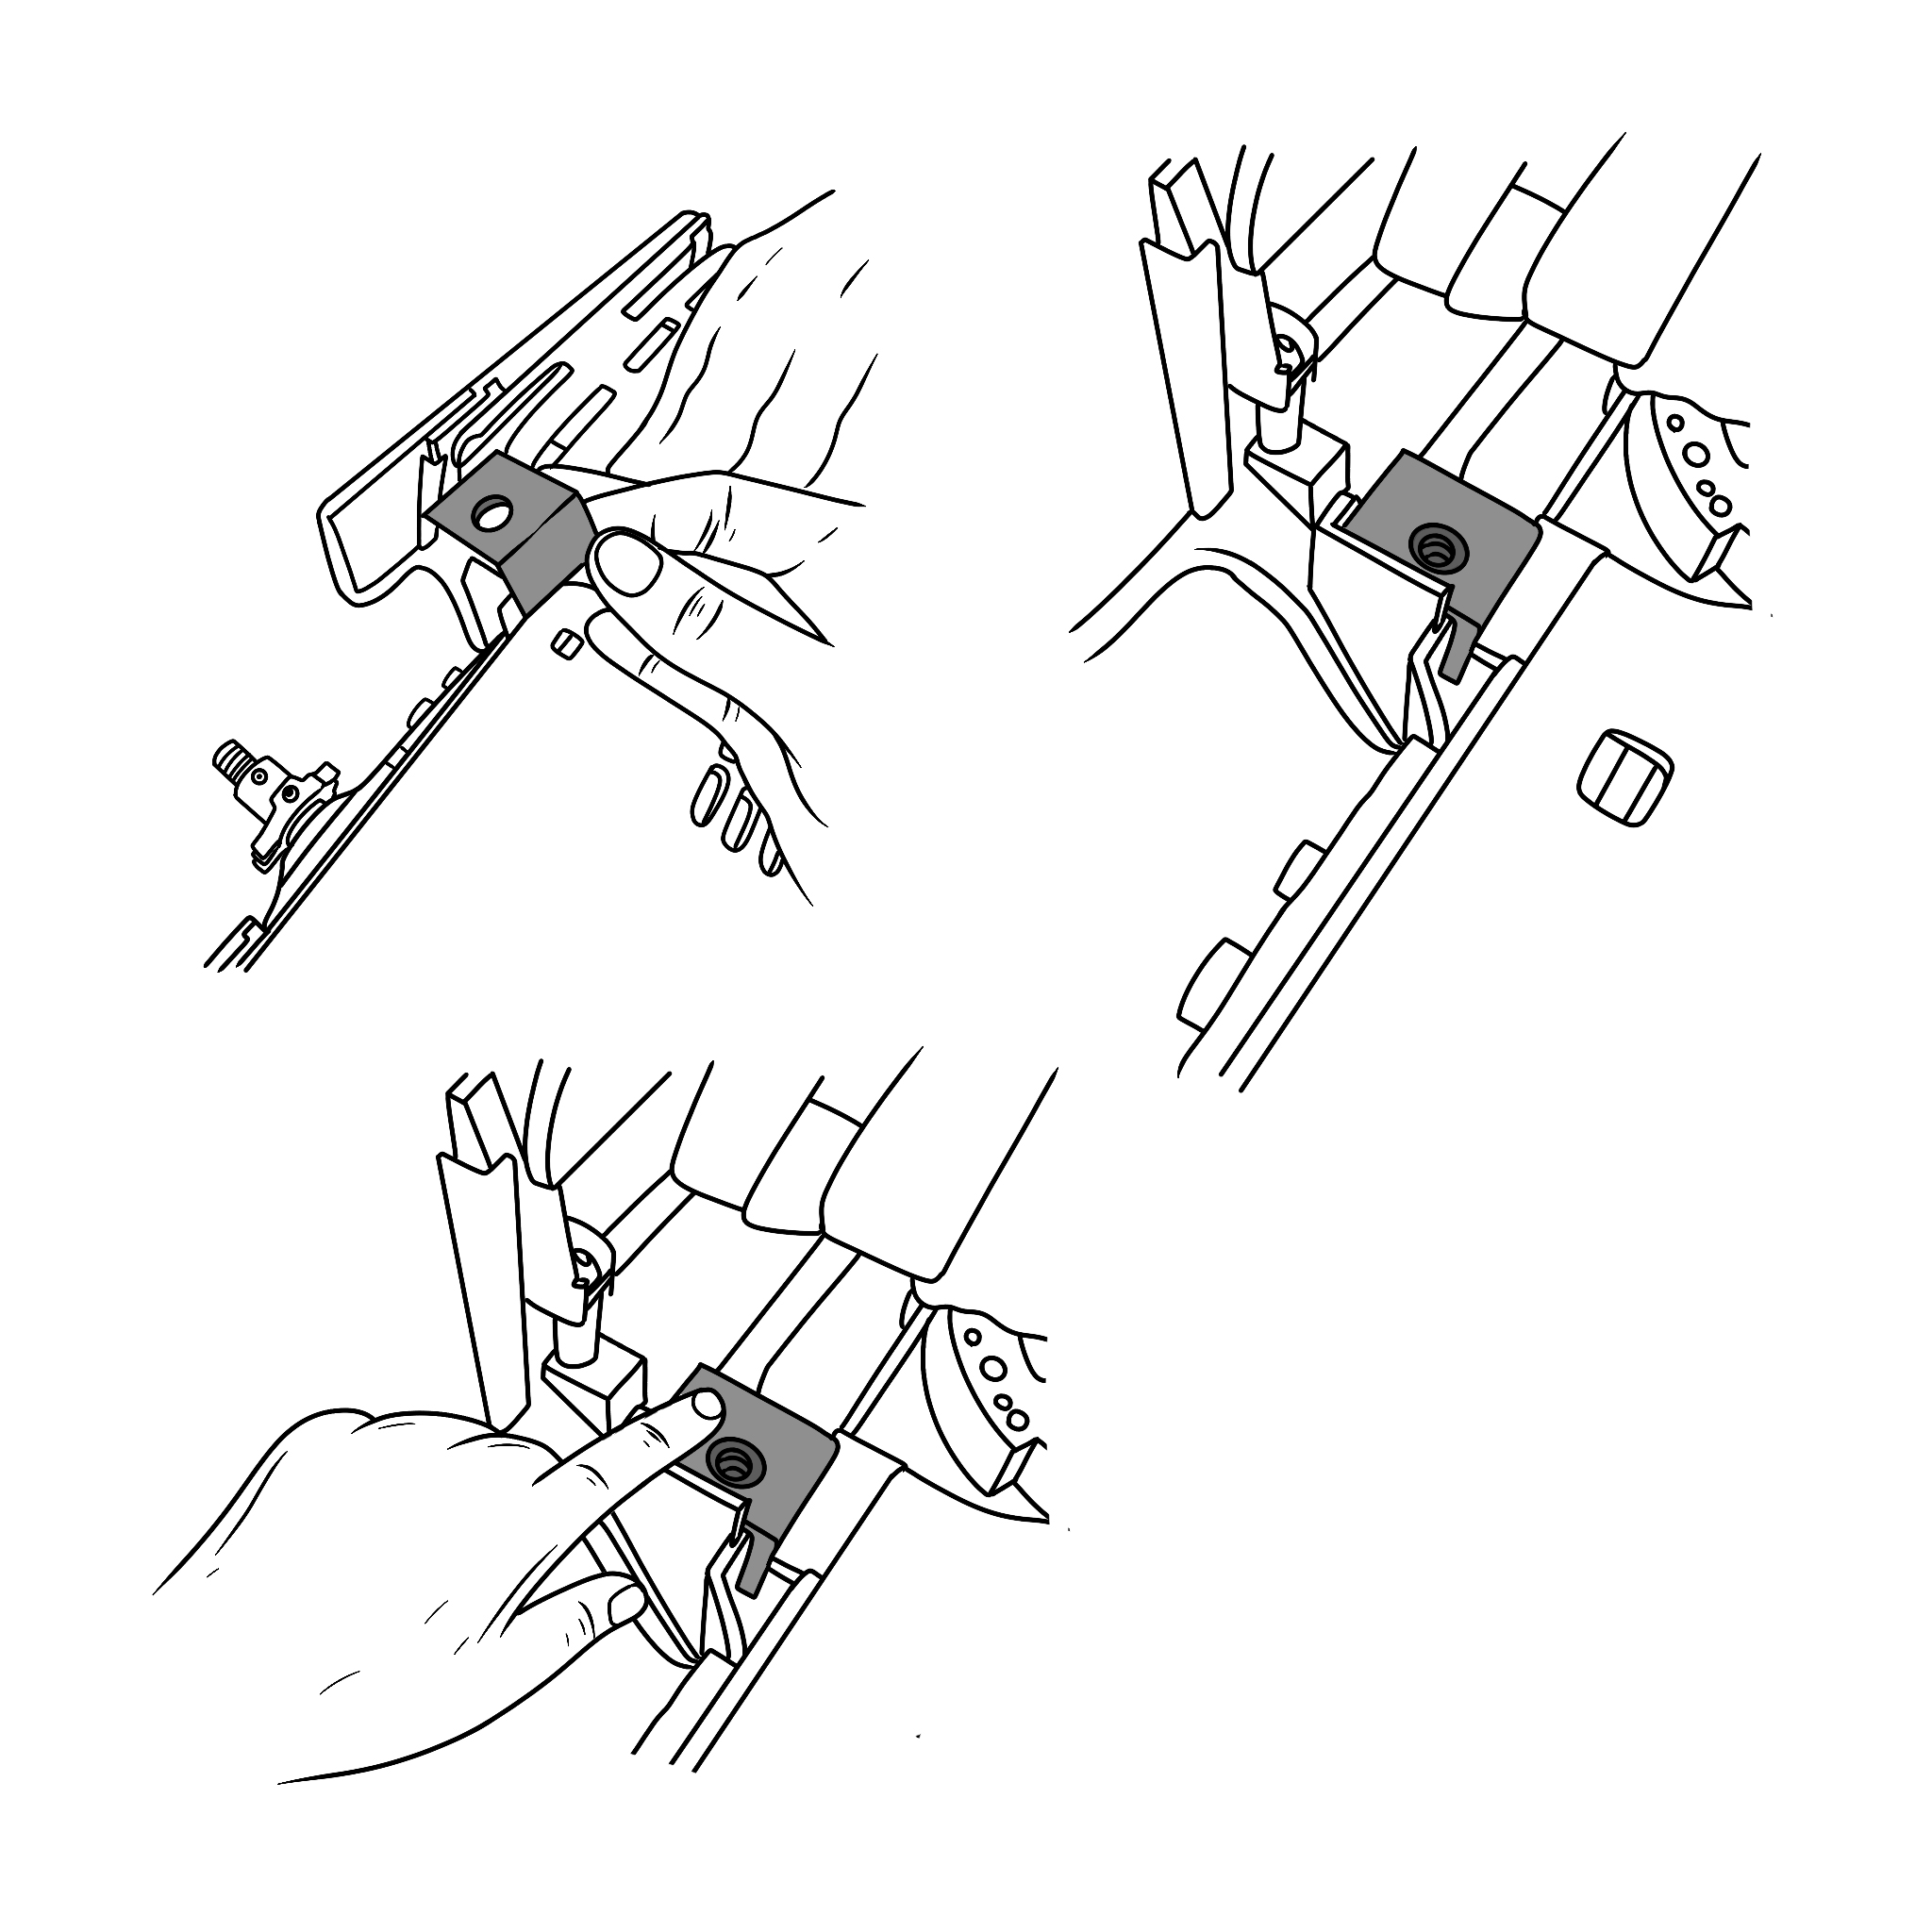
This step is only for the following models:
M500 (WR141E), M500 Plus (WR165E), M700 (WR142E), M700 Plus (WR167E), M800i (WG757E), M800i (WR111 MI), M900 (WG758E), M1000i (WG796E.1), M1200i (WG799E).
a) Use the distance bracket M (plastic) supplied by us.
b) Put it in the position where the black rubber part was before, as shown in the picture.
c) Please check if the hole of the spacer M (plastic) is properly seated.
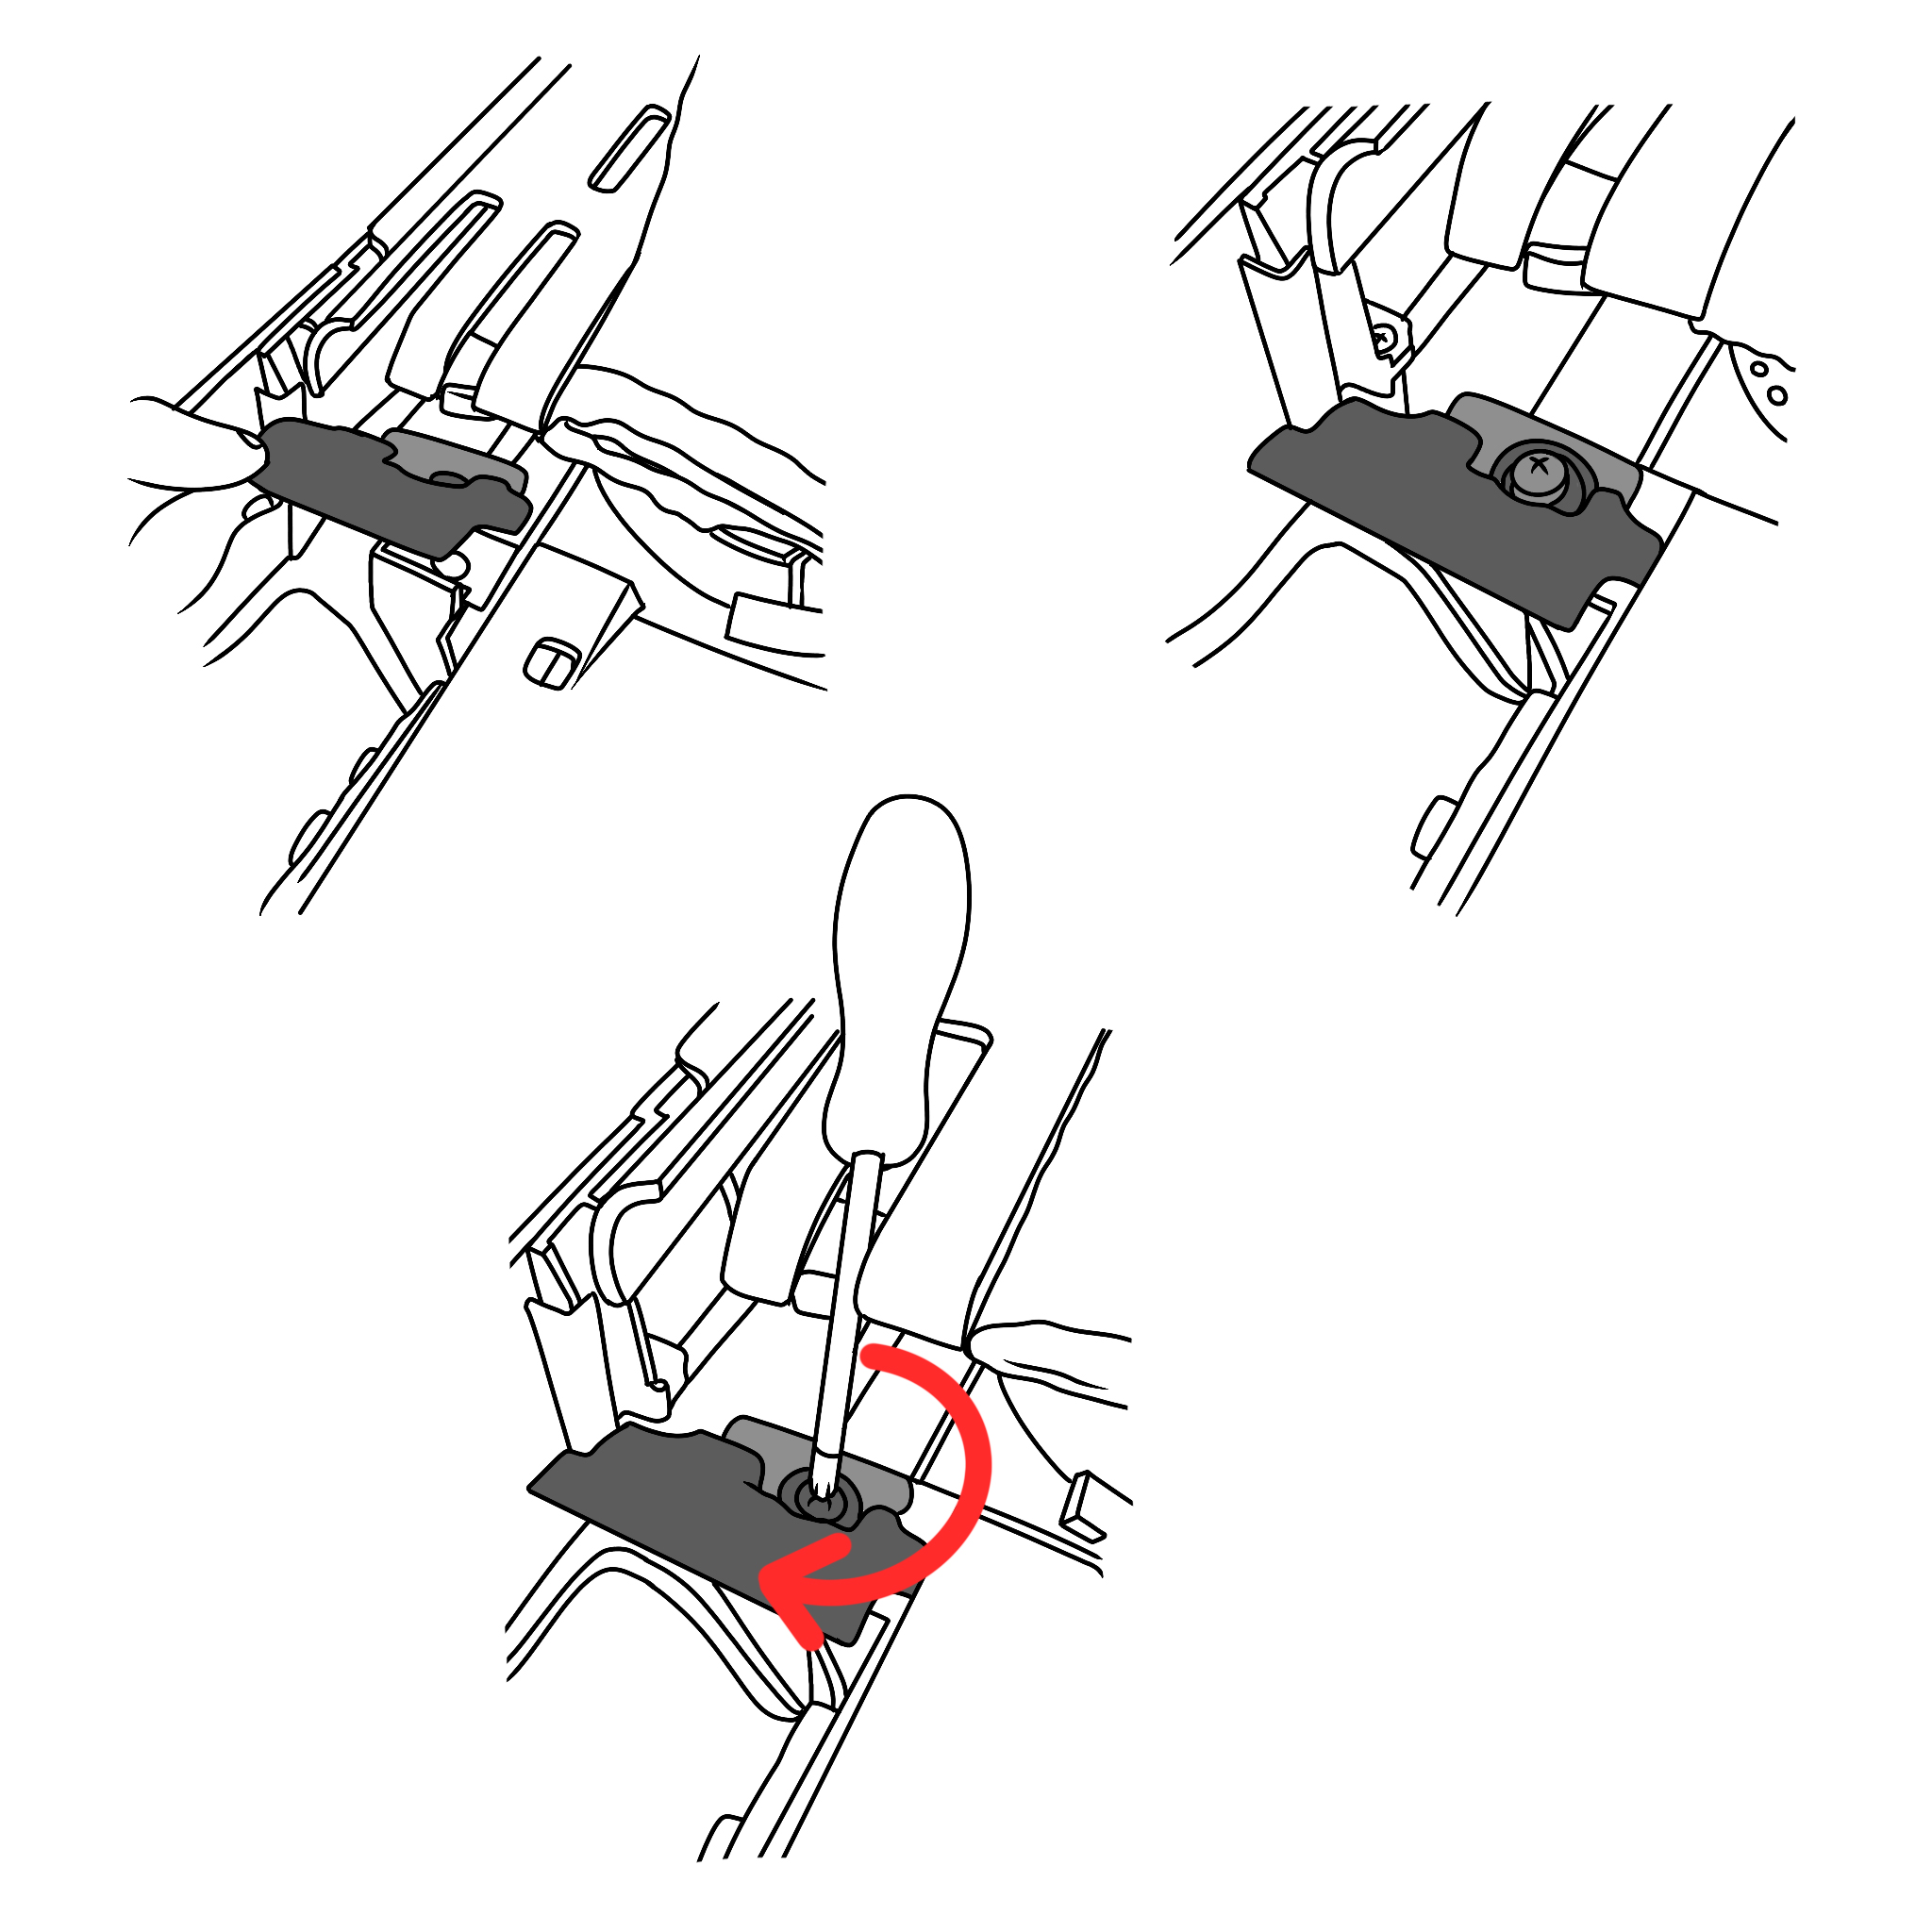
This step is only for the following models:
M500 (WR141E), M500 Plus (WR165E), M700 (WR142E), M700 Plus (WR167E), M800i (WG757E), M800i (WR111 MI), M900 (WG758E), M1000i (WG796E.1), M1200i (WG799E).
a) Put the black rubber part back to the original position, which is on the distance bracket M (plastic).
b) Attach parts by screwing the original screw back through from the top.
c) Please check if the screw is fixed correctly.
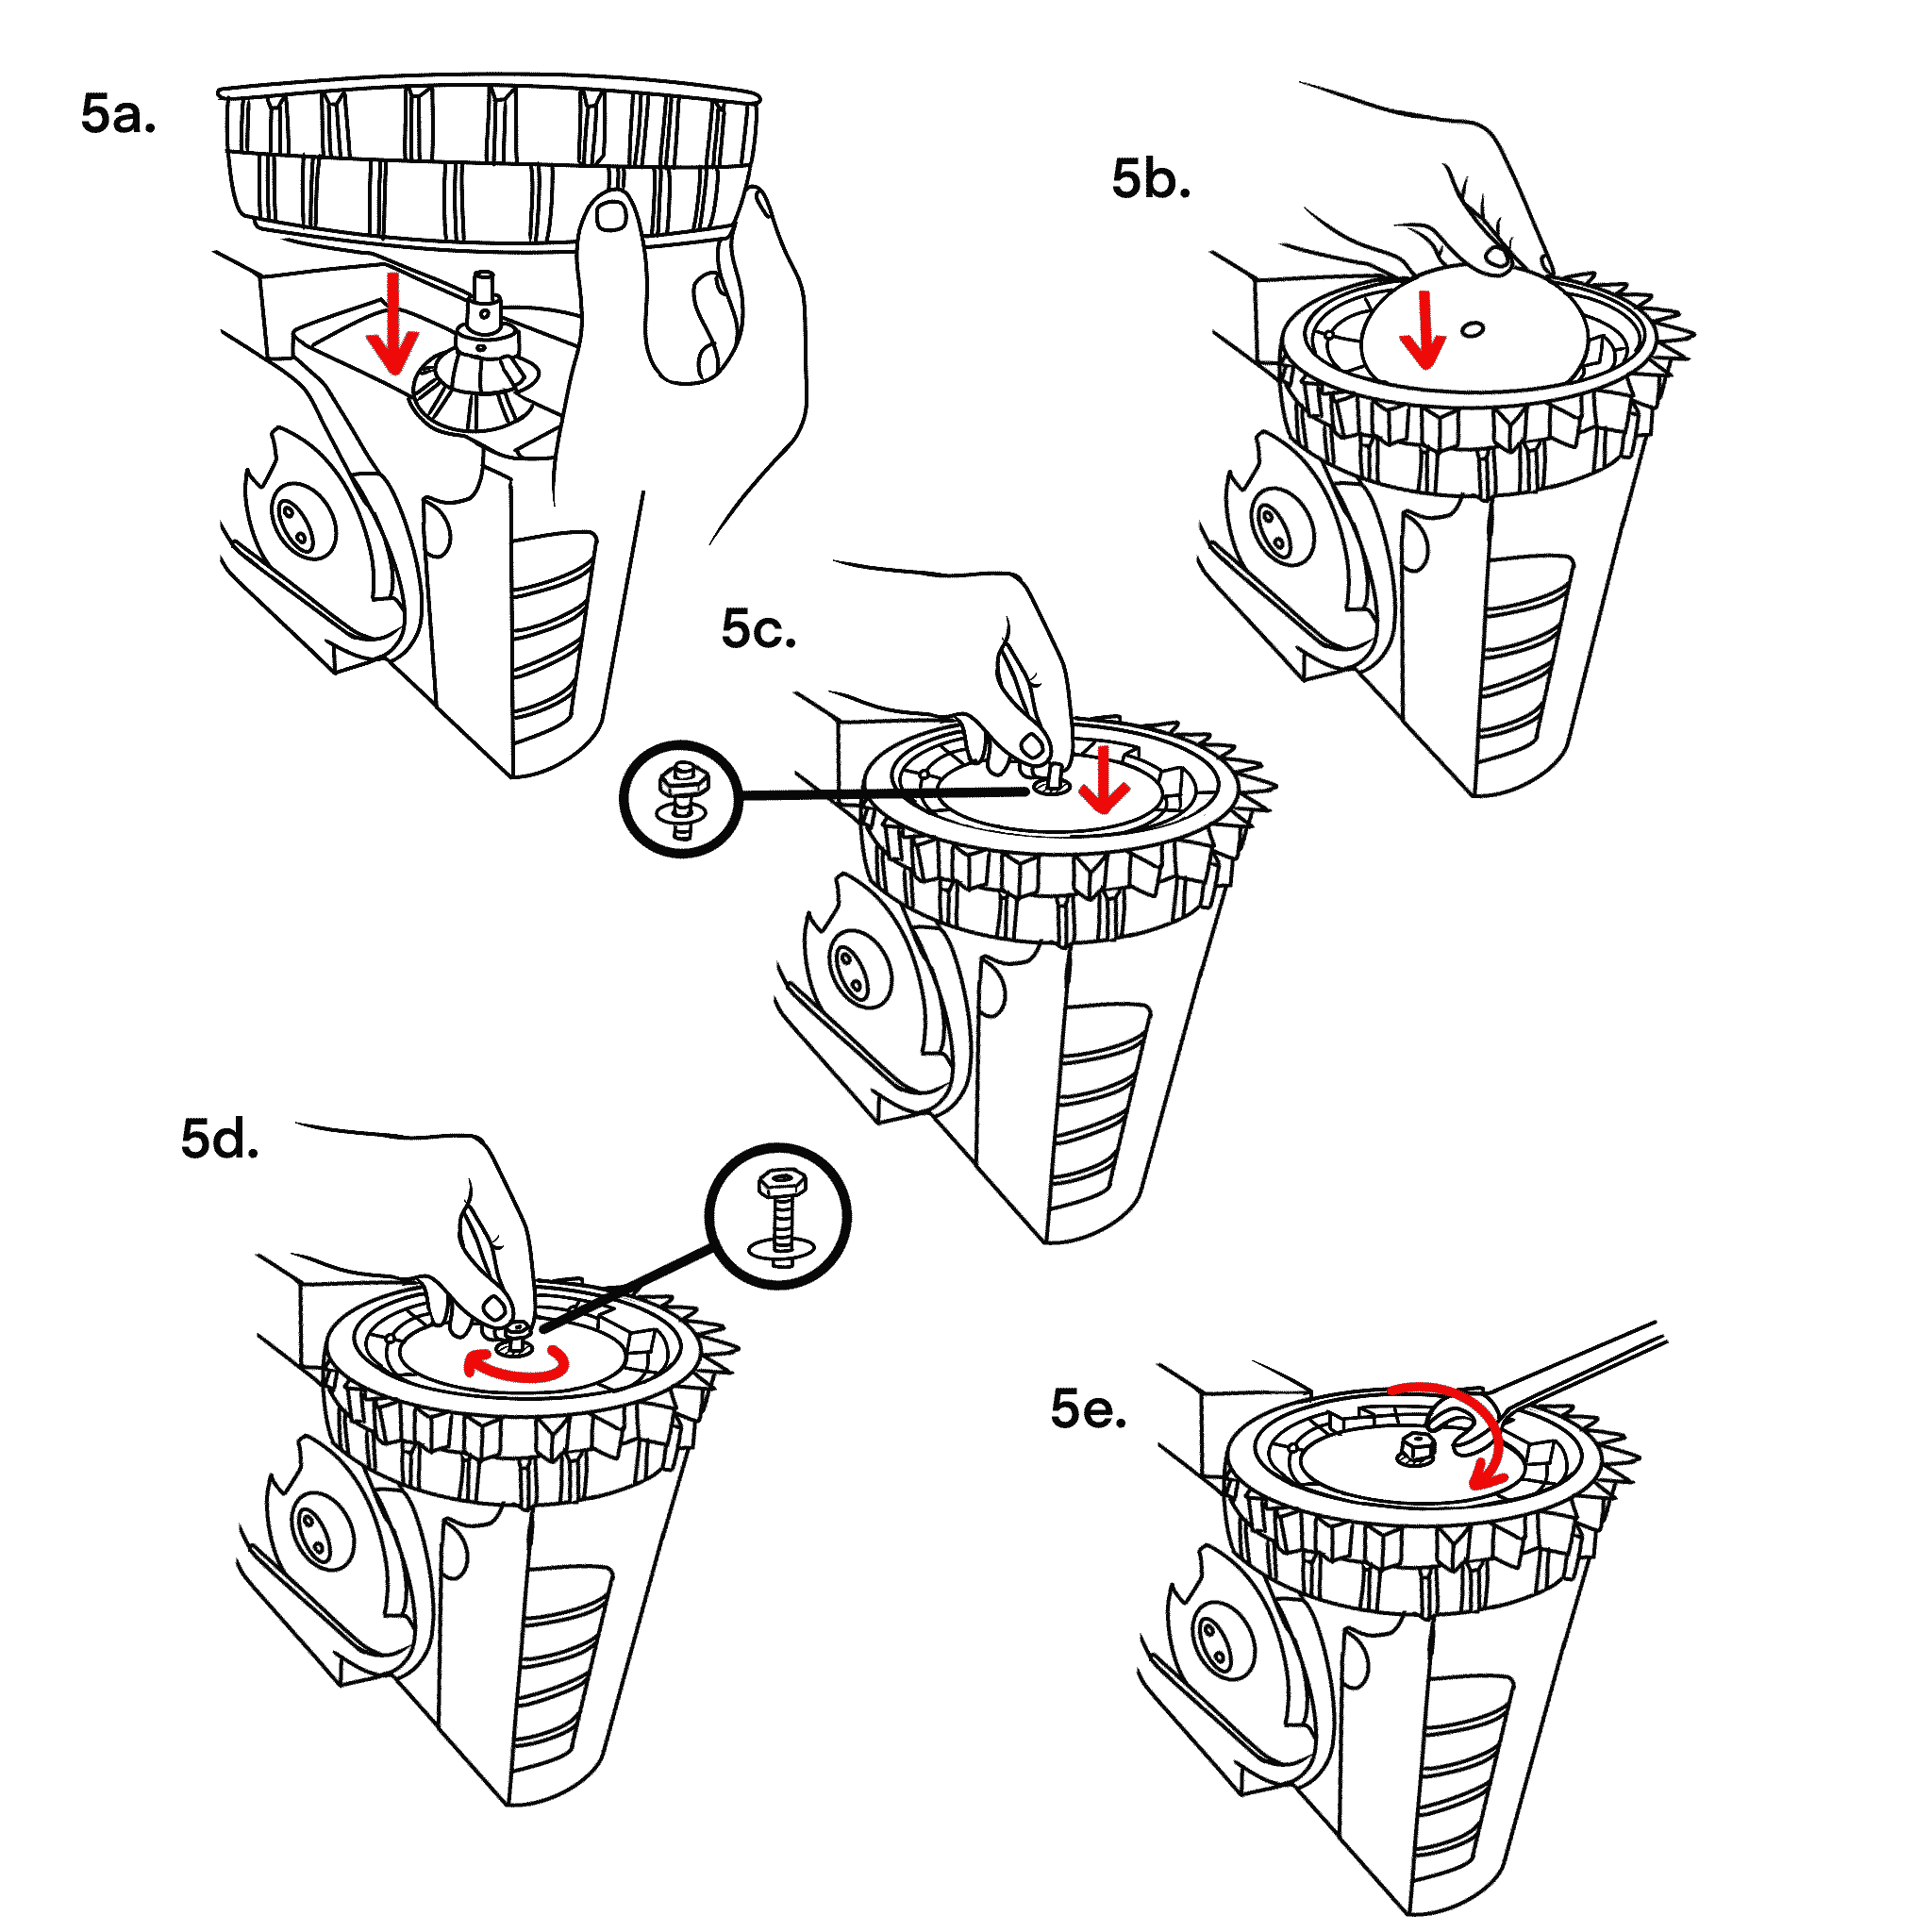
5a: Align the wheel so that the stainless steel spikes face outward. After you put the wheel back on the thread, turn it until it clicks into place.
5b: Put the large black steel disk back on the wheel.
5c: Take the small black lock washer first and then the nut to reconnect the wheel to the WORX.
5d: Hand tighten the nut slightly.
5e: Now we use the 16mm combination wrench to properly secure the wheel. It is best to perform this step while your WORX robotic lawnmower is on your lawn so as not to damage any surfaces.
To prevent the wheel from turning while tightening, lightly tap the wrench with your hand.
Repeat this step for the second wheel.
Once both wheels are mounted, put the hubcaps back on the wheel.
Note that the tabs on the hubcap must be inserted into the recesses in the wheel.
Repeat this step for the second wheel.
Spikes:
Stainless steel (V2A) is a corrosion-resistant and weatherproof material. Nevertheless, corrosion (rust) can occur with the contact of, for example, metal chips.
Holder (plastic):
The adapter is made of high-quality polylactide (PLA) plastic. PLA is both a colorfast and UV-resistant material and has low flammability. Polylactide has a temperature resistance (glass transition temperature) of approx. 45°C-55°C and is therefore not suitable for use in the vicinity of direct / extreme heat and heat sources.
We wish you a lot of fun with your product.
Your 3idee Team